My first experience of Silbersalz35 film

I recently discovered a new colour film called Silbersalz35 (through one of my fave photography sites Thephoblogger). I say ‘new’ but it isn’t really new, technically speaking. Because it’s 35mm Kodak motion picture stock repackaged for stills cameras.

Now, this isn’t an original idea. Cinestill (and others) have been doing this for a while. But the difference is that Cinestill has certain elements removed so it can be processed in normal C-41 chemicals. Whereas this is just the pure film which has to be processed in ECN-2 chemicals. Does it make much of a difference? Well, I thought it was worth finding out…!

Silbersalz are a film production company in Germany. As far as I’m aware, they’re shooting on film and processing and scanning it all in-house. I’m guessing that somebody came up with the idea of repackaging the Kodak motion stock into stills film alongside the production company. And I’m rather glad they did.

You order the films in a batch of four, and they come in the following flavours (the D and T denoting Daylight or Tungsten balanced):
50D
200T
250D
500T

As it was my first test with the films, I thought I’d order one of each. There is also the possibility to order a batch which will be bleach-bypass processed. Silbersalz will process and scan the whole lot on a Cintel scanner and deliver the files via Dropbox as JPEGs and TIFFs.

First up was the 250D. The weather was still quite bright so I didn’t want to try out the 500 just yet, and the 50iso was much slower than I’m used to. Also, they recommend shooting one stop over; so rating the 50iso at 25iso is rather scary when I’m usually shooting at something between 100 and 400!

Now, I only have one shot from this whole roll. And I’m not sure what went wrong but I think there may have been some kind of operator error (ahem!). I have a lot of double exposures, sometimes triple exposures. I’m thinking that maybe I hadn’t loaded the film properly; it seems less forgiving with basic errors like that. But still, it looks pretty nice and the grain seems very good. I like the look. But having a bit of a ballsed up film, I’ll just park this one here and move on to the next…

Silbersalz35 250D, Olympus OM10

Silbersalz35 250D, Olympus OM10

Next up was the 50D. It’s slow. But the sun was out. So I thought, why not?
Now, this film is absolutely gorgeous. Exactly what I was hoping for… it’s got this stunning depth and glow to it that is almost three dimensional. The colours have fantastic saturation. It doesn’t look like any film I’ve shot on before - it really does look like stills that have been pulled from a movie. Which is what I wanted.

Even inside using natural light it looks great!

Silbersalz35 50D, Olympus OM10

Silbersalz35 50D, Olympus OM10

Silbersalz35 50D, Olympus OM10

Silbersalz35 50D, Olympus OM10

Silbersalz35 50D, Olympus OM10

Silbersalz35 50D, Olympus OM10

Next was the 200T. And first, the downside… I did have some problems with this one and it took me a while to work out what the problem was. Every time I wound on after a shot, the rewind crank didn’t turn. Was it winding on? Did I not load it properly? After opening up the back of the camera in a black bag, I could feel the film was wound on and there was tension, so I started to suspect that it wasn’t loaded in the canister properly.

But I also started to worry it was a camera issue. So, I carried on shooting but without having much confidence that I’d get any shots back!

At the end of the roll, it did turn out that the film was not loaded properly. However, I said to Silbersalz about this and they very kindly sent me out a fresh film all the way from Germany at their expense - so a big thumbs up for that. I’ve got that film loaded up at the moment, the below shots are from the problematic film.

As for the film itself, I once again loved the look. Understandably there was a little more grain than the 50D, but it was still nice and tight. It being tungsten balanced, I was unsure how blue it would be, but pushing the white balance back towards the yellows in Lightroom quickly popped it back into more natural colours.

Silbersalz35 200T, Olympus OM10

Silbersalz35 200T, Olympus OM10

Silbersalz35 200T, Olympus OM10

Silbersalz35 200T, Olympus OM10

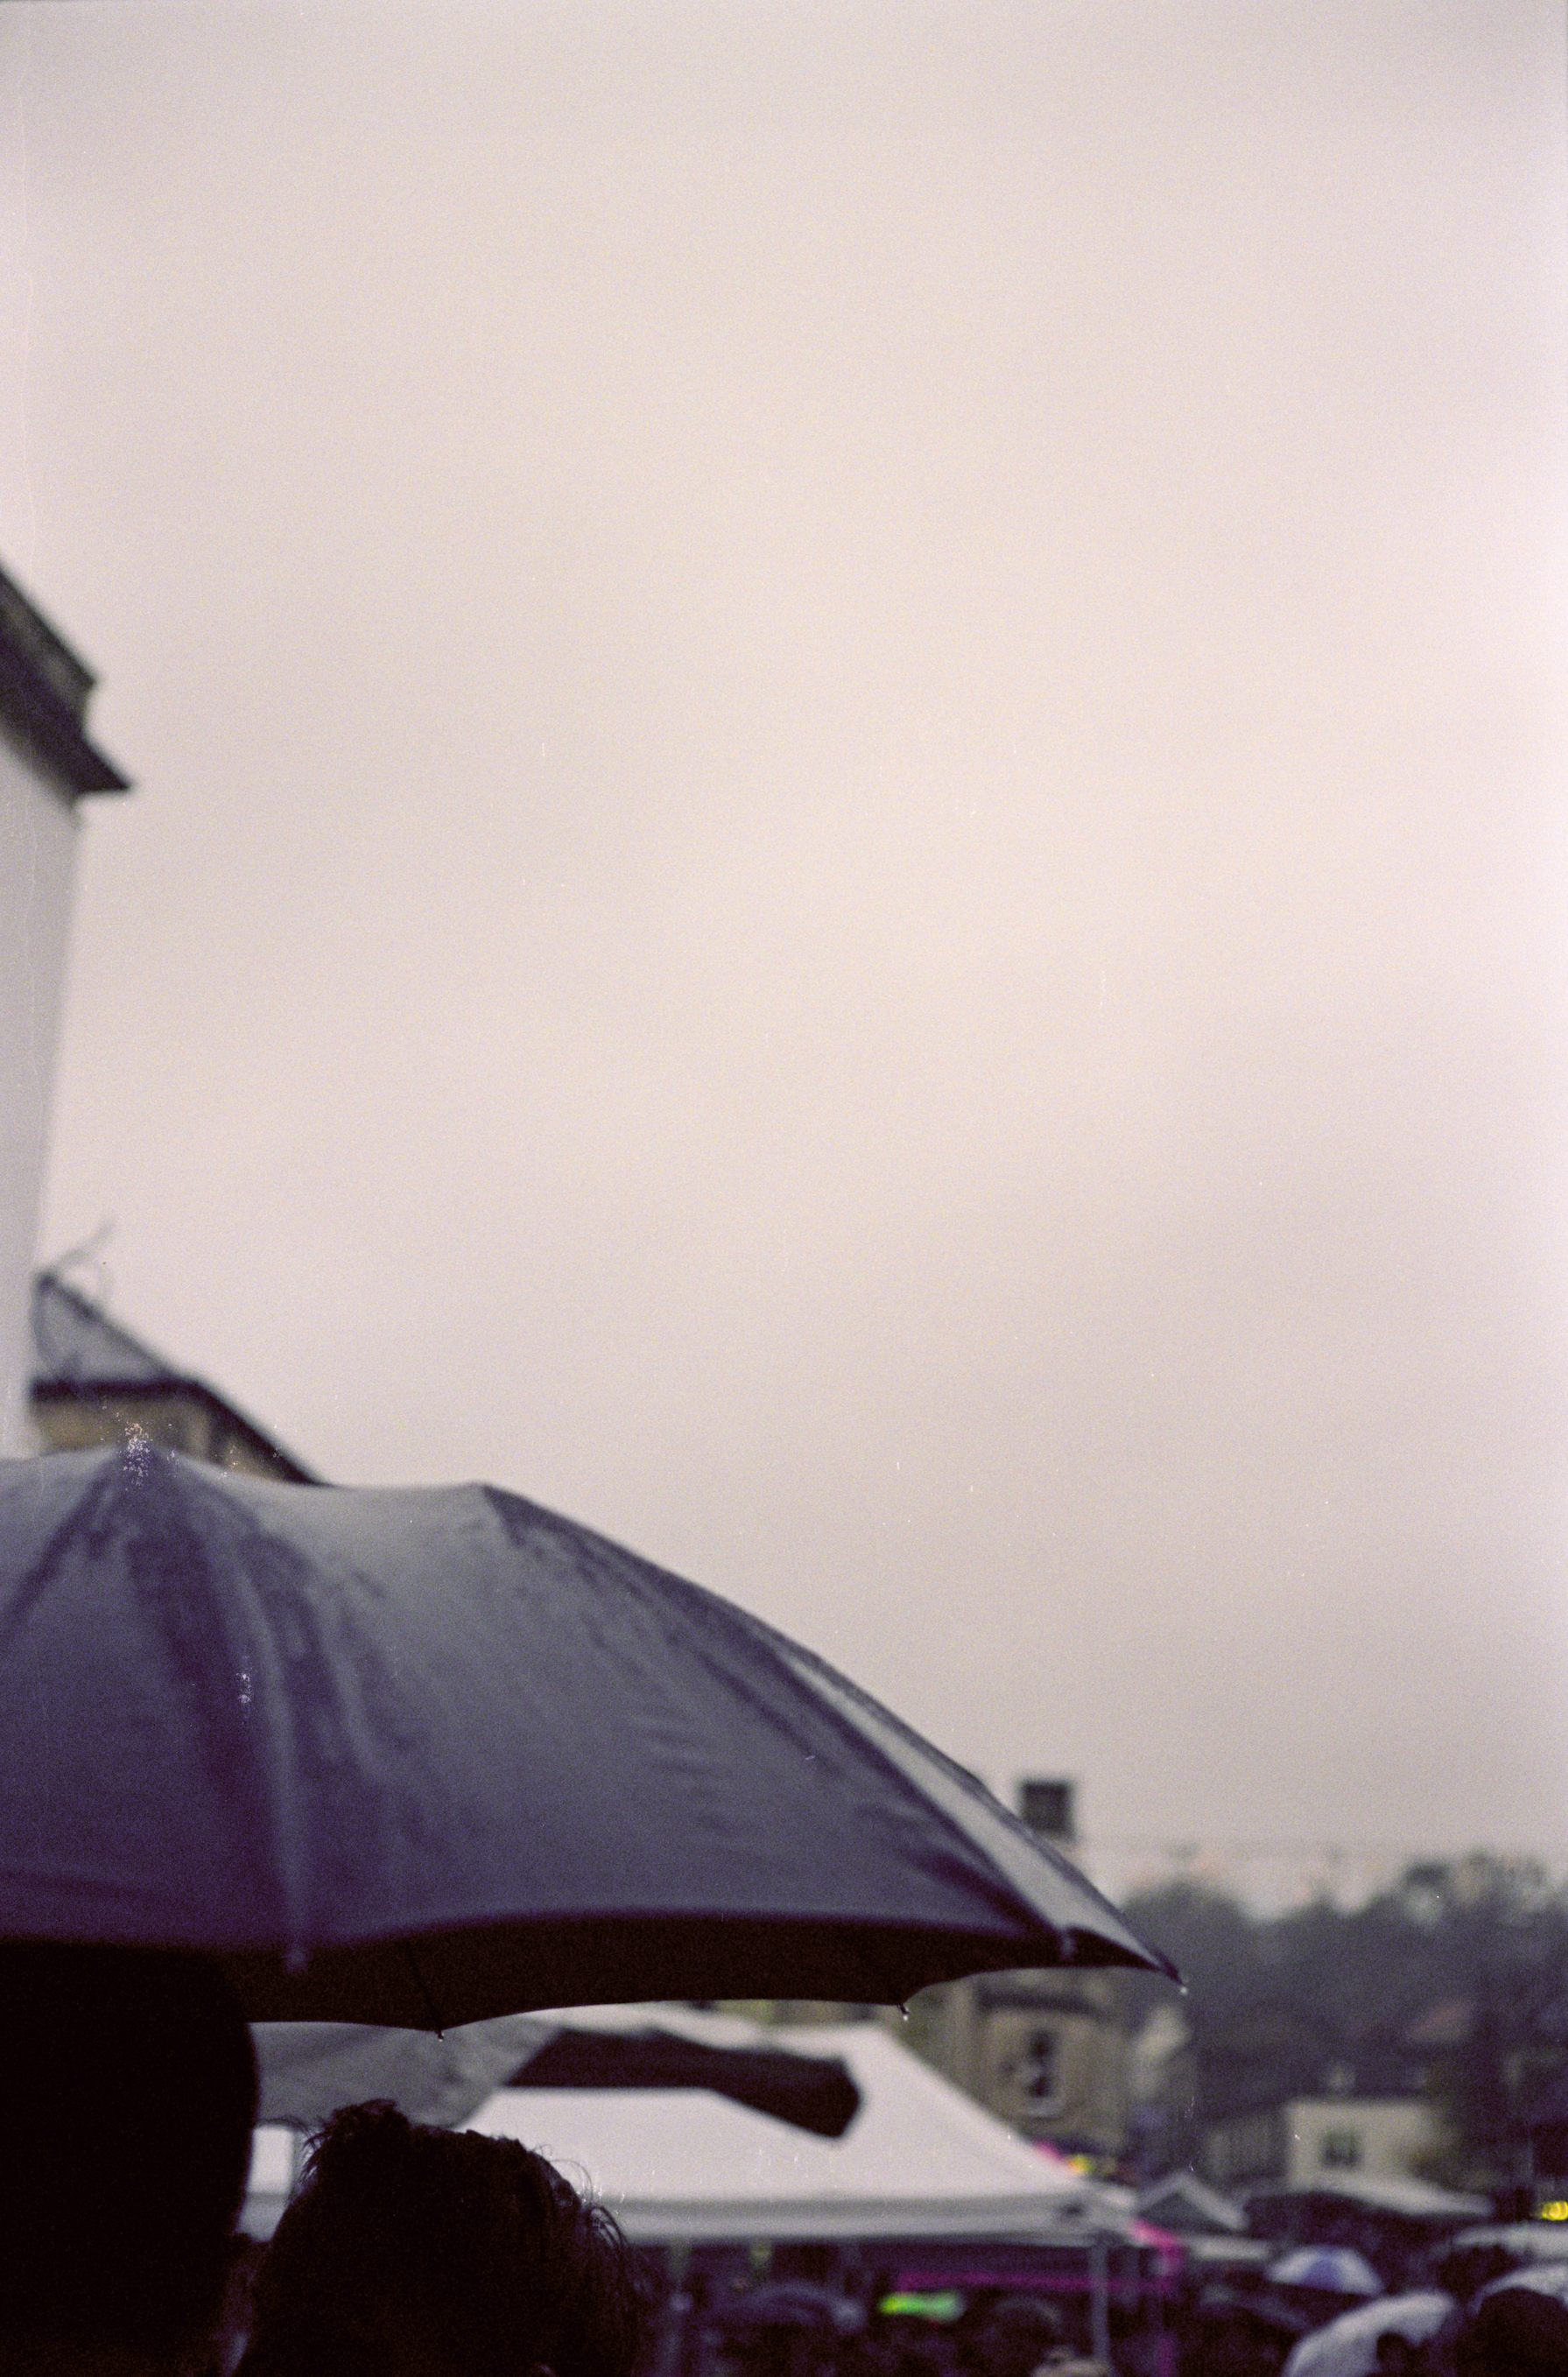
Lastly, on to the 500T. This is the one closest in speed to my usual favourite colour film, Kodak Portra 400. For this film, I was still a bit unsure about my Olympus and whether it had a problem or not. So I loaded it up in my Yashica Electro 35. Most were shot in one day which was gloomy and rainy at times, therefore it was putting up a bit of a challenge when rating a tungsten film at 250. But I think this film held itself up very well.

It has noticeably more grain than the others. But not in a distracting way. What it does have is a lot of flexibility - I was able to pull out some good shots from some quite murky exposures.

Silbersalz35 500T, Yashica Electro 35

Silbersalz35 500T, Yashica Electro 35

Silbersalz35 500T, Yashica Electro 35

Silbersalz35 500T, Yashica Electro 35

Silbersalz35 500T, Yashica Electro 35

Silbersalz35 500T, Yashica Electro 35

Silbersalz35 500T, Yashica Electro 35

Silbersalz35 500T, Yashica Electro 35

I think Silbersalz have got an excellent thing going on with these films. Straight away it has given me a different look to my shots - I think it’s closer to what I’ve had in my head for a while. I still need to experiment a bit more but my first impression is that all of the films look great, and all of them are extremely flexible for post processing. I’ve even tried knocking a couple into monochrome, and working with them just tonally has been great too.

The scans are also very good. Hardly any dust or hairs - Silbersalz have really looked after this. But be warned - the TIFF files they provide are BIG. The download was about 7GB per film. But worth it for all that lovely filmic detail.

And it’s an excellent price too. They’re currently selling four rolls including processing and scanning for €40. OK, there are shipping costs both ways too, but this maxed out at €60 which is still great value for what I’m getting.

Out of the four films, I think I’d probably say the 50D is probably my favourite. It is silky smooth and I love the rich colours. However, it is currently winter in the UK and trying to shoot at 25iso is very restricting, so I think I’ll save that one for the summer. For now, I’ve ordered up four rolls of the 500T but with the bleach bypass option, and I’m really looking forward to how that turns out with some nice wintery light.

This isn’t an advert whatsoever, but you should really have a look at what they’re up to https://silbersalz35.com.

Kodak Tri-X.... finally braved it!

Kodak Tri-X.
What do we know about it as a film?

Well, it’s been used by some of the most famous photographers to create important, fantastic, iconic images across all genres of photography. If you’ve seen a black and white photo over the past 60 years (or more) that has stopped you in your tracks, chances are it may well have been shot on this film.

It was originally released in 1940 in sheet format, with 35mm and 120 formats being released in 1954. Like other things that have stood the test of time of that era (like a Fender Strat or a Gibson Les Paul), some tweaks have been made since then. But fundamentally it is still the same. They got it pretty much right first time out.

Some of the photographers that have used this film are my benchmarks: Don McCullin, Henri Cartier-Bresson, Robert Frank, Pennie Smith, Garry Winogrand, Vivian Maier, Anton Corbijn….. and many more. Apparently Sebastien Salgado wouldn’t even switch to digital until he was 100% sure he could emulate Tri-X.

It’s the kind of black and white photography I love. It’s not overly grainy, but still has a bit of bite and grit to it. It has life to it. But it also has a lot of history to it because of all those fantastic photographers. In the same way as picking up a fantastic guitar has, you know that you can’t hide behind any excuses. There’s no “oh, this film is a bit too grainy/doesn’t expose properly in the midtones/hard to scan” etc etc blah blah blah.

No. This film has been proven to be bloody awesome.
Which is why I think I’ve not tried it until now. I’ve been a bit scared of it.

So, I put a roll of it in my OM10. Rated it at 200, took a deep breath, and went out to play.

I’m not sure if I got my best ever shots whilst trying it out (more down to the usual things - light not being perfect, missing a particular moment etc) but WOAH!!!!!! this film is soooooo good!!!

I’ve said before how I love Ilford Pan 400. And I do. Really, it’s an ace film.
But Tri-X really is on another planet to anything I’ve shot with before.

Once I’d scanned the negs and popped them in Lightroom, it was an absolute breeze working with the shots. So much flexibility in the tones. I could crunch the blacks down but still keep loads of detail if I wanted (look at the blacks below! Yum Yum Yum!!!). There was massive amounts of detail in the highlights I could pull back down. The grain was nice and tight; just enough to give the shots a bit of life without being intrusive.

The missus even stopped what she was doing to say how good the shots looked (this is a rare thing - she likes my photos but rarely stops what she’s doing to actually come and look over my shoulder as I work).

This film just has life to it. It has something which you just cannot put your finger on.
It’s not cheap. So I’m not going to shoot a lot of it. But it’s going to be my go-to film for special stuff. (Honestly. I’m not going to order shedloads. Really!!)

Is picking up a 60s Strat going to turn me into Hendrix on Voodoo Chile?
Is picking up a 50s Les Paul going to help me make the sounds Clapton did with John Mayall?
No. Not a chance.
I’m not expecting this film to give me McCullin’s eye. There’s way more to it than just the film.
But shooting with this is a pretty damn good starting point to getting a gorgeous image.
Seriously hooked on this….

OCT_2018_1809_20_101118.jpg
OCT_2018_1809_33_091118.jpg
OCT_2018_1809_16_101118.jpg
OCT_2018_1809_31_091118.jpg

Pushing film

I’ve recently experimented with pushing some film. It’s not a new idea but not something I’ve personally tried before.

For those that don’t know what pushed film is, I’ll explain it quite simply:
You underexpose the film and then push it back to what it should be in the developing.
For example, if you have a 400iso film and expose it as 800iso then you’re pushing it by one stop of exposure. This will allow you to shoot at a faster shutter speed but the film will be one stop underexposed. Therefore when it is developed, it needs to be adjusted accordingly.

Why do this?
Well, it can be handy in low light situations. If you only had a 400 film you could shoot it at 1600 in bad light.
Also, as an aesthetic decision: when you’re pushing film in this way then it increases grain and contast. So if that’s the look you want then it’s a good way of getting it in camera.

I had some rolls of my favourite films from the summer left in the fridge: Ilford Pan 400 and Kodak ProImage 100. Having shot quite a bit on these two films, I thought they’d be pretty good to experiment with.

Both of them I shot pushed by two stops. So, the Pan 400 I rated at 1600 and the ProImage 100 I rated at 400.

First issue I found which I didn’t expect at this time of year: really bright sunlight. Not just the occasional bright Autumnal morning. Nope - bright, contrasty light all day for a week or two. It was lovely for catching shadows… but I was rating my 400 film at 1600. Which meant I was pretty much stuck on an aperture of f16. Which isn’t the end of the world but I do prefer a bit of flexibility!

To be honest, I’m unsure if pushing the Pan 400 really added much. Apart from some grain. I think it’s fine to use for pushing and I’m happy with the results (and it ends up being cheaper to push this than buy some faster film!) but I don’t think it really added anything to the shots.

SEPT_2018_8395_10_071018.jpg
SEPT_2018_8395_17_071018.jpg
SEPT_2018_8395_22_071018.jpg
SEPT_2018_8395_32_071018.jpg

When pushing a colour film the saturation levels should also increase. The scans from the pushed ProImage had noticeably more punch to the colour. Not that the colours were washed out before. It’s just there was a noticeable difference after having been pushed. More contrasty colours; possibly good to play around with during the winter.

OCT_2018_1762_05_081118.jpg
OCT_2018_1762_10_081118.jpg
OCT_2018_1762_25_081118.jpg
OCT_2018_1762_35_091118.jpg

Overall, it’s been handy to try pushing a couple of films and I will probably try some more. However, the downside is that the whole film has to be push processed, so you are tied in to doing that for the whole film. Which - as I found with the 400 speed film - can limit you from time to time. However, I’m quite interested in trying it out for a gig I’ll be shooting next month.

All shot on my Olympus OM10. As far as I remember, these were shot on either the Zuiko f1.8 50mm or Panagor f2 35mm.

Scanning, holidays, and new films

For quite some time I've felt the need to have more control of what is going on with my film scans. I've used several labs over the years for processing and scanning, and whilst none of them have done a bad job, I've never been 100% sure if it could be better or not. It seems to be adding a variable into the process which I have no control over - is the exposure wrong because of me or is the scanner not set up properly? The same goes for the focus - is the lab's scanner out? Or am I just not getting things right when shooting?

So, I needed my own scanner. By doing it myself, I can not only be more sure of any variables, but I can also tweak each shot if I want. Because I know what I was shooting and what the scene looked like.

I'm a bit tight on space at home, which meant a flatbed scanner was out; which was a shame as a flatbed would do various formats. So I went for a Plustek Opticfilm 8100 35mm scanner.

I'd heard that there was quite a steep learning curve to the Silverfast software which comes with it. The first few scans I wasn't particularly pleased with at all - it was all looking a bit grungey. After looking at some tutorials, I then found what some of the tools were doing in the software and was on top of it pretty quickly.

It has multi exposure on it, which means I can do two scan passes. I'm scanning fairly flat without bumping up any contrast. So the resulting TIFF files are a bit washed out. However, when putting them through Lightroom then they really come to life. I've started saving presets for each one to speed up the post process.

The first scans I made where from a short break in Cornwall. I was trying out some Kodak ProImage 100, a film that is not readily available but is apparently being marketed more in Europe now. Which is a good thing, because I rather like it! It's very much like Kodak Portra - natural colours, nice saturation and renders skin tones nicely. It also has quite a bit of flexibility - I could push certain colours a bit if I wished. The film was apparently first released in 1997 and not been updated since; mixing that with my OM10 and old Zuiko glass gives it a feel of my youth in the 80s/90s.

CORNWALL_JULY18_3397_05_020818.jpg
CORNWALL_JULY18_3398_18_020818.jpg
CORNWALL_JULY18_3399_30_030818.jpg
CORNWALL_JULY18_3397_07_030818.jpg

The next film which I'd not used before was Fomapan 400. I'd used Foma 100 and 200 before (see earlier journal entries) and liked the results - particularly the 200. So I thought I'd give the 400 a shot. I'd read that it wasn't quite as good and I think I'd have to agree. Tonally I found it quite flat and stubbornly didn't want to be pushed anywhere. Too much exposure made it break up quickly, too much shadow just crushed the blacks. I like a bit of grain with my black and white film, but the grain I found a bit crude. Unlike Foma 200, I don't think it will be high on my shopping list in the future....

JULY_2018_1475_03_040818.jpg
JULY_2018_1475_22_040818.jpg
JULY_2018_1475_31_040818.jpg

Next up was Ilford's Pan 400. And this was completely different - nice tight grain, a wide range of greys in the tone allowing me to play with it to my heart's content, and a gorgeous look which has an almost 1960s documentary look to it. I've got another roll in my camera at the moment and already excited to see how it turns out - really love this one!

JULY_2018_1476_16_050818.jpg
JULY_2018_1476_22_060818.jpg
JULY_2018_1476_29_060818.jpg
JULY_2018_1476_37_060818.jpg

One thing that I didn't expect from using my own scanner was seeing the difference straight away between different emulsions. I could see a massive difference between Foma 400 and Pan 400  just by seeing the initial scans before I even put them into Lightroom. Even the physicality of the film is different - the Foma more prone to being damaged than the Ilford.

I have to say, the Plustek scanner is great. I've got scans from it that are just as good as I've been getting from pro labs. And I'll be tweaking the settings more to see what else I can get out of it.

And Kodak ProImage and Ilford Pan 400: big thumbs up! Now, I wonder what Pan 100 is like...!?

All shot on my Olympus OM10.
Kodak ProImage 100 rated at 80asa.
Fomapan 400 rated at 200asa.
Ilford Pan 400 rated at 200asa.

Bath Carnival 2018

This weekend saw the return of the annual Bath Carnival. And I was excited to be asked by the organisers to be one of the official photographers. The carnival is always great fun and brings the whole of the city centre together in a mass of noise and colour.

With the weather being gorgeous at the moment, Sydney Gardens was heaving for the day long party and the streets were full of smiling people watching the procession. It's a fantastic atmosphere.

Usually for events that I'm photographing for myself I'll have a mix of colour and monochrome shots. But working to a brief this year, I knew that I'd be doing them all in colour. I'd planned on some shots for my personal use being in monochrome but then decided against it when editing. The day was so colourful I decided for a change to just go with that carnival atmosphere.

I love the challenge of events like this. I find it quite an adrenaline rush being in the thick of it, trying to create good shots and capturing the essence of what is going on.

To make life more interesting for myself, I was shooting a lot of it with my 135mm manual telephoto lens; so not only was I trying to shoot stuff quickly but I was also not having the safety net of auto focus. However, this only added to the enjoyment! If I wasn't shooting with that then I was going to the other extreme - using a wide angle lens to get in really close to the action; you definitely feel a part of what's going on when you've got a thunderous drumming band getting pretty close to your face (note to self - definitely need a nice wide angle prime!)

The Carnival is non profit and does workshops with many groups to bring the whole thing together. You can donate to keep it running at their Localgiving page.

Here are a few choice shots. There are quite a few more over on Flickr.

KID_SYDNEY_GARDENS.jpg
BATALA START.jpg
RED CAPE.jpg
YELLOW FEATHERS.jpg
FEATHERS.jpg
MILSOM STREET.jpg
BATALA LOW.jpg
JAMMA.jpg
UMBRELLA.jpg
FACE_LAURA_PLACE.jpg
BATALA_JUMP.jpg
GIRL_DANCE.jpg
ROBYN.jpg

Geeky stuff!
I used my Olympus OMD EM10ii with these lenses...
Olympus Zuiko 135mm f3.5.
Olympus M.Zuiko 14-42 f35-5.6ii.
Panasonic Lumix 25mm f1.7.
 

Helios 44-2

The latest addition to my lenses is something I've wanted for a while - a Helios 44-2 f2.

It is thought to be one of the most mass produced lenses ever, which is what makes them relatively easy to find... and also cheap! Manufacturing began in 1958 in various factories - the one I have is a 1973 model made by KMZ. Like many Russian lenses, it is a copy of something more expensive, in this case the Zeiss Biotar.

It is a 58mm lens, which makes it 116mm on my Micro Four Thirds Olympus. So, longer than I'd usually use but I'm finding I'm adapting quite well to various focal lengths of the different vintage lenses I'm playing with at the moment.

One of the most well known attributes of this lens is the swirly bokeh. Shot wide open and with a favourable background at the right distance, it has a very unique look. It's pin sharp in the centre and then the swirls get more drastic the further out you go.  I've seen portrait shots with a background of foliage work very well with this. You can see the swirls starting to appear in the shot of the Coke can below.

JULY_2018_P7040052_040718.jpg

Having said all that, with a different kind of background the bokeh has no swirls and is ultra creamy!

JULY_2018_P7040059_040718.jpg

There were several variations of the Helios made. The 44-2 supposedly makes more swirliness than some of the later models. But it also has a pre-set aperture ring, which is something I've not used before. Basically, there are two aperture rings - the first one has clicked stops on it as usual and you can set that at what you want your smallest f stop to be. So, if you want a range of f2 - f5.6, you set the aperture ring to f5.6. The second aperture ring is then clickless and will allow you to do whatever you want between f2 and f5.6. I thought it would be a bit odd to use but after a while I just forgot about it; although there were some times when I noticed the aperture wasn't where I thought it would be... more practice is needed!

It is also very good for focussing with. Some manual lenses are a bit tricky to get it nailed precisely. But this is very quick in bringing into focus. And it focusses very close too - I can almost shoot macro!

JULY_2018_P7040064_040718.jpg

I bought the Helios from Wycameras in Leeds who I highly recommend and was delivered just in time for me to have a week away in Cornwall. So I'll be having a really good chance to put it through its paces.

A big new addition to my lenses...

A couple of months ago I bought myself a 135mm Zuiko lens (see previous post). And since then I've been using it quite a bit - particularly on my OM10, although I need to scan the images from those once I buy a new scanner (more on that in future posts).

However, I knew that for a telephoto I'd still need even longer for the occasional use at race circuits. So I started looking at 200mm lenses - mainly Zuiko, and also some Vivitars. I wanted as fast as possible which is f3.5 or f4. And after casually watching things on eBay and looking at various secondhand sites, I discovered a 200mm f3.5 Mitsuki lens.

Mitsuki? Never heard of them. But it was £15. And nobody else on eBay seemed interested in it. So I did a bit of research. And it appears that it was a rather obscure lens from the late 1970s which was made using the (at that time) state of the art computer system at Tokina. So really... it was made by Tokina. And even more interesting (if you're a geek like me) is that it came out of the Tokina factory at the same time Tokina were making lenses for Vivitar. Which is a good thing!

So, I got it for £15. And I've taken it out and about a bit.
And here are some tests I did with it.
 

JUNE_2017_P6040589_040618.jpg
JUNE_2017_P6040575_040618.jpg
JUNE_2017_P6040582_040618.jpg
JUNE_2017_P6040666_040618.jpg

I think it was quite a bargain. Wide open it does have some fringing - on high contrast areas there was a bit of purple but I soon managed to clean it up. And in the last photo you can see a bit of green fringing. But stopping down sorts it out too.

Quite heavy though!
And long. Very long. Even longer with the retractable hood out.
To be honest, it's so long it looks a bit silly on my Olympus.

But hey.... it was only £15 and should work nicely for shots of Fernando Alonso heading in to Stowe corner in August!

Using a telephoto lens

Telephoto lenses. Not something I usually use.
However, I have recently acquired an old Olympus Zuiko 135mm f3.5 lens - which makes it a 270mm lens on my Olympus EM10ii, due to it being a Micro Four Thirds camera.

How did I come to buy a focal length of lens which I wouldn't usually touch?

Well, a good friend of mine has asked me to be the photographer at her wedding. And straight away my first thought was lenses. Handily, my brother (https://www.worsfold.photos/) has just started shooting on a Sony and offered me his MFT kit to use, including the 17mm f1.7 and 45mm f1.8. Both great lenses which will add to my kit and should cover me.

I then got thinking about lenses with a bit more length to capture people mingling without shoving a camera too closely in their faces. I have my long zoom which I usually only get out for when I head to Silverstone (see earlier post from the Bath Carnival). But it's not the fastest of lenses and it spends most of the time sitting around doing nothing. I'll probably use it for the wedding though, just because it gives me options and I can autofocus with it to capture important things quickly.

I then started thinking about lenses for my visits to motorsport venues and whether I really need a zoom? I very rarely use zooms, preferring to use my feet. And I do get a bit annoyed with cheaper zooms and their variable aperture. If I'm fully wide with a lens at f4, I want to be able to zoom and it stays at f4. And unless I'm willing to pay vast amounts of cash for something I rarely use then I've got to put up with that. Or have I?

I looked at the exif info from various races I've been to and could see that I only really use a couple of different focal lengths with a zoom. At last year's World Endurance Championship race at Silverstone I was pretty much at 200mm most of the time, with a few shots in the 130-150mm focal length. So I got to thinking, why don't I just carry a couple of prime lenses of those focal lengths? They're going to be faster than the zoom. And I reckon the quality will be a bit better. I don't need autofocus - the cars are too fast for it to keep up.

So I went shopping. And after doing some research, the first prime telephoto I have got is the Zuiko. It's a good lens - very small for something of this focal length. It's lightweight and very quick to focus with. It also has a nifty lens hood built in.

TONYGUY.jpg
SEAGULL.jpg

I took it out for a wander around town on my lunch break and although it gets some nice shots, I'm finding it a bit odd for my normal kind of photography. I'm used to seeing something and pretty much knowing what I get in shot because of the focal lengths I use. With this, I'm much closer to the subject; so the photo I see in my head I'm not getting and I have to step back a bit.

It also feels a bit odd taking photos of strangers with it. Whereas usually I'm up fairly close, now I'm further away. Which feels a bit sneaky to me. It doesn't feel like I'm involved as much and gives a distance which I'm not 100% comfortable. I'm not sure if that is obvious from the photos or whether I'm reading too much into it.

BARBER.jpg
REFLECTION.jpg

I think it deserves a bit more experimenting with though. I quite like the idea of being able to get other foreground elements in to frame a subject. So maybe I just need to rethink how I work with it.

Zorki 4

As an addition to the Jupiter 8 lens I bought last month, I thought it only right that I also had a nice rangefinder which it would have originally been paired with.

So I got myself a Zorki 4.

The Zorki 4 came out of the Krasnogorsk factory near Moscow and was the first Zorki to be sold in large quantities to the west, which is probably why there are quite a few examples around. And which also keeps the used price low!

Built between 1956 and 1973, my model is from 1960. I could have got one for the same price from '58, but they upgraded them slightly in '60 and added some extra shutter speeds in. The Zorki 4 was basically an update of the Zorki 3, which itself was a copy of the Leica III. And it's a very nice thing. Feels like a decent solid camera to have in your hand.

FEB_2018_0-3_010318.jpg

I'd not used a rangefinder before. So the focussing took a bit of getting used to. And the photos I got back show that I need more practice! But the shutter is lovely and quiet - I can see why so many street photographers in the past liked these. I've also been a bit wrong footed with the focussing distance of the Jupiter 8. Unlike a lot of modern lenses which allow me to focus up relatively closely, the closest I can get with this is 1m, so I'm having to rethink some shots. Added to which, there is also the parallax of looking through the rangefinder/viewfinder window to what is actually captured on film.

FEB_2018_0-19_010318_Z.jpg

I loaded the Zorki up with a roll of Foma 200 film as I had a few kicking around. I think as a film it works quite nicely with this vintage of camera and lens. Although not my best shots ever, there's a certain way this camera, lens and film combination is capturing the light which I really like (the shot of the bottles above being a good example... if you'll forgive the slightly dodgy focus!). It reminds me of the look some European cinema was getting in the 1940s/50s; in particular Luchino Visconti. It's grainy with a real nice three dimensional feel to the shadows.

It looks old. it isn't about the precision, but capturing the tonality beautifully.
I've loaded it up with some more Foma 200, so with a bit more practice I'm hoping to start capturing some really nice images with the Zorki.

FEB_2018_0-2_010318_Z.jpg

It would also have been rude not to have bought yet another of my favourite straps for the Zorki. So I went shopping at www.1901fotografi.co.uk. Check out their straps. They're lovely.

Fomapan 200

Recently I've been playing with some Fomapan 200 film in my OM10. I've previously tried Foma 100 before in 120 format and read some good reports about the 200 speed variety, so thought it might be good to try out as it's a pretty cheap film.

As with pretty much all my photography on film nowadays, I tend to rate the film so I overexpose. Having read that Foma 200 had a couple of stops of latitude, I rated it as 100. And I'm liking what I'm getting (although some reports say rating it at 160 is even better).

FEB_2018_0-3_010318.jpg
FEB_2018_0-10_010318.jpg
FEB_2018_0-12_010318.jpg

It's got a nice bit of grain to it, which is something I quite like in black and white film. And it has what I'd consider quite an old look; slightly vintage. It doesn't have the precision that some newer films have, it sort of has the feel of street photography or documentary photography from the 1950s/60s, of which I'm a bit of a fan.

Tonally, it was really nice to play with afterwards. I could get some nice deep blacks whilst keeping a nice range of greys up to white to give the kind of contrast I like. I think I'm a bit of a fan of this lovely Czech film!

FEB_2018_0-21_010318.jpg
FEB_2018_0-24_010318.jpg
FEB_2018_0-8_010318.jpg

Jupiter 8

Bloody hell, it's been a long time since I've posted anything in my journal. I blame it on life getting incredibly hectic with the arrival of my Mini-me, Robyn in December.

Anyhooo.... I've been interested in various old lenses for quite a while and what effect they would have on my photography. And this seemed like the perfect time to try some out. Trying to save a bit of cash at the moment because of the aforementioned little 'un, I can't really go splashing out on some of the lenses I'd like. So I got myself a nice old Jupiter 8.

For those that don't know, the Jupiter 8 was one of the standard lenses that came with the Russian Zorki rangefinder cameras. During World War Two, the Zeiss factory in Jena were making their Sonnar lenses in a Leica thread mount. These Zeiss lenses were excellent. And when the Russians invaded Germany, they took over the factory. They took the designs and made various copies of the lenses in the Krasnagorsk (KMZ) factory to go with the Zorki cameras (which were themselves Leica copies).

The Jupiter 8 is a 50mm f2 lens. And it's rather nice. Mine is from (I think) 1968. A chrome one, rather than a black one (the chrome ones are supposedly better, the black ones from 1970 onwards became a bit inconsistent with quality apparently).

The aperture ring has no stops, which takes some getting used to.

The focus ring is quite fast and loose which means you have to be very precise (this might just be my model, of course). On my Olympus EM10ii it becomes the equivalent of a 100mm lens which is longer than I'd usually use.

But overall it's quite fun to have on the camera. And it's making me think a bit. And it gives a slightly different look, I think. A bit 'older'.

Now to try it with a Zorki and a roll of film....

FEB_2018_P2060384_060218.jpg
FEB_2018_P2100054_100218.jpg
FEB_2018_P2100094_100218.jpg
FEB_2018_P2100091_100218.jpg