Oh. It would seem the last update to my journal was January 2021. It is now November 2022.
Hey, I’ve been busy!!!!
Normal service will resume soon with random thoughts about photography. But in the meantime, I’ve given the website a nice refresh of more recent shots.
I also set up a seperate site for sales, too! So if anyone likes what I do then they can get a nice print to put on their wall over at this place www.jamieworsfoldphotographyshop.co.uk.
Meike 28mm f2.8 - cheap and very cheerful!
I’ve been keeeping my eye on the Meike lenses for a while. There’s a lot of nice things being made very affordably in China at the moment. From my experience with the 7Artisans 55mm, I knew that there were great things out there for very little cash. But I didn’t really know whether there was much point in buying the 28mm (which is what I was looking at) as the focal length I already had covered.
However, something I wanted was a little pancake lens for my Oly EM10ii. Something which I could just set on an aperture and snap some shots. Also, as I’d bought my Bronica… I wanted to be able to take both that and my Oly out in as small a package as possible.
Straight away I’ll say…. these are not ‘perfect’ lenses. There are technical issues and they’re manual focus only. So if you need an ultra sharp, autofocus lens which costs less than £50, then feel free to find it!
However, what the Meike does is gives you bags of personality. When light is optimal, you’d be hard pushed to see the difference between this and a much more expensive lens. When the weather is not too good then you’ll be working hard with it. But it is definitely worth it!
The only downside (and this is VERY picky) to this lens is the lens cap. It’s one of those push-on ones. Seriously…. they were shit in the 70s, they’re shit now. Every five seconds it falls off. Off to eBay for a cheap cap that works!
But back to the main show: It’s not the sharpest lens out there, but it gives your shots a nicely classic look. And being only manual focus, it WILL make you want to nail that shot more!
I really like it. And for less than £50 you really can’t go wrong.


Lockdown book
During lockdown (that’s the first lockdown, not the most recent one… or any of the others we may have in the future!) I was out and about with various cameras and film emulsions documenting the times.
I rarely ventured into town, so there were very little shots of empty streets in usually busy shopping areas. Instead, I was documenting what was around me - a much more rural setting than I usually capture.
I’ve now put some of these into a book. And it’s for sale!
You can see it if you click HERE

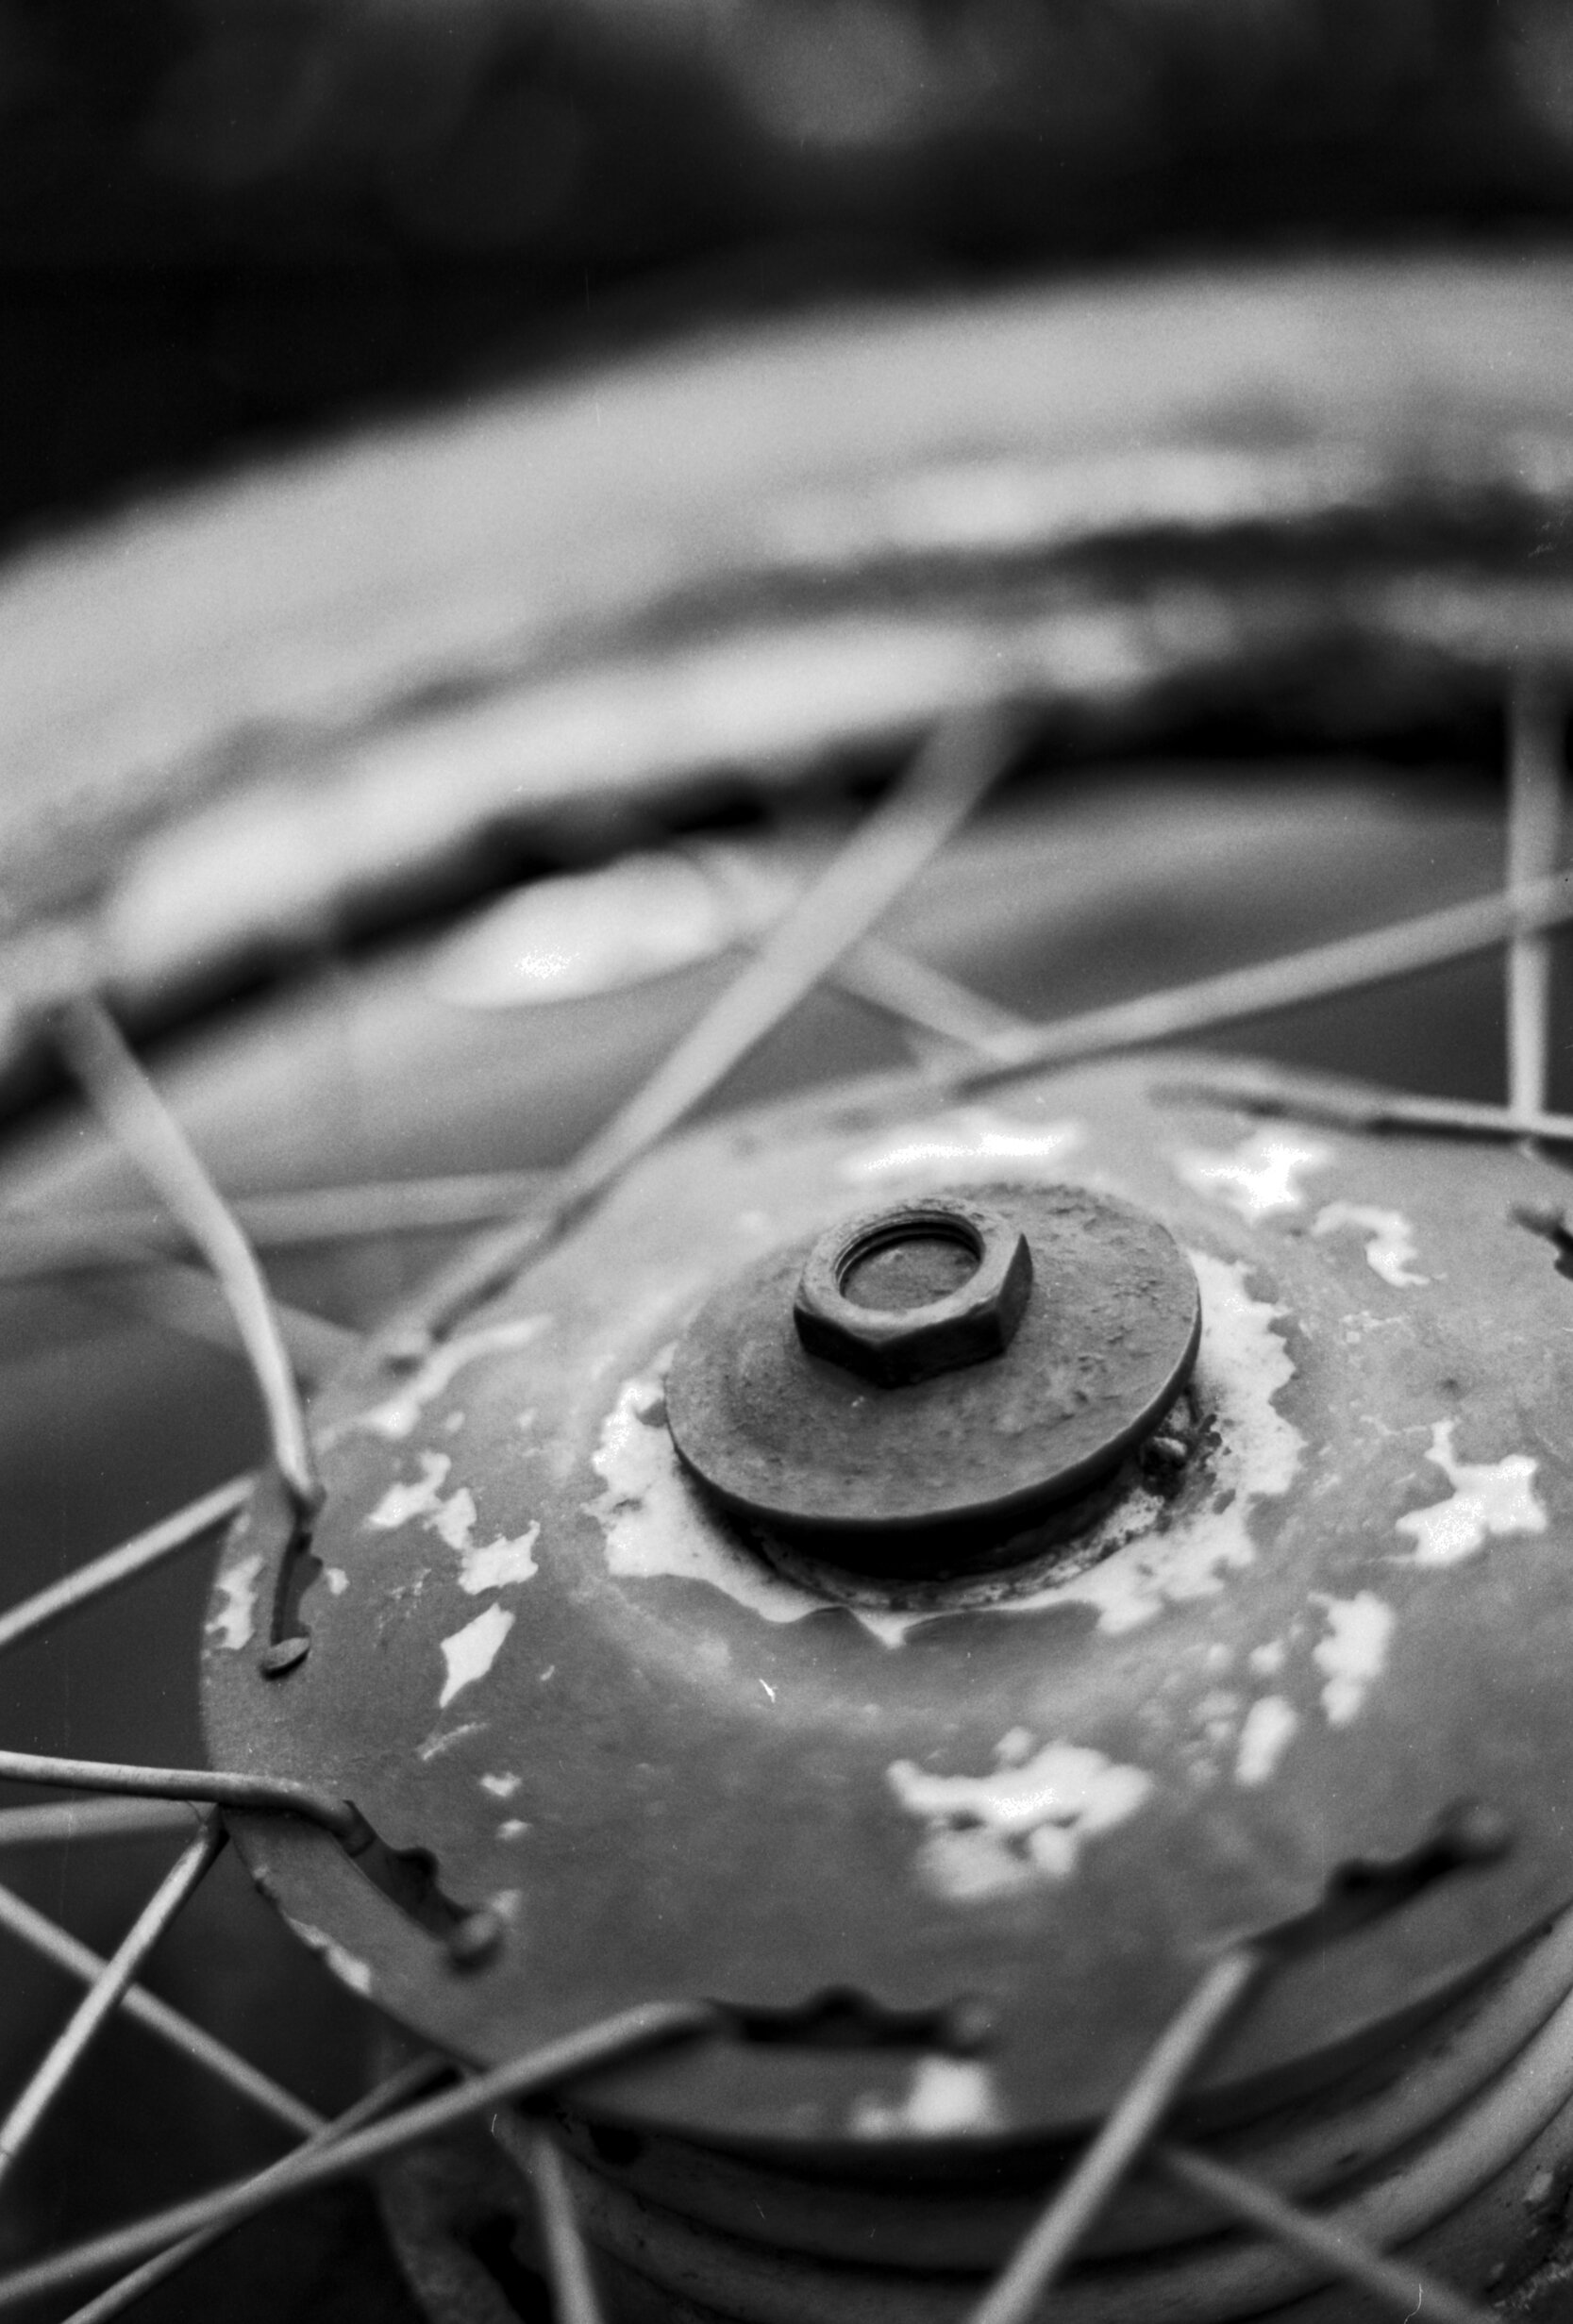
My lovely new Bronica EC
What does a good person do when they can’t go to the pub for months?
That’s right - save up that cash and buy a Bronica!
Yes, I went and bought something I’ve wanted for quite a while.
A proper system-based medium format camera.
I couldn’t afford a Hasselblad. I’d been eyeing up the Bronica ETRS for a while, as well as the Mamiya 645 (but both have recently jumped up in price quite a bit). I’d even been contemplating a Kiev 88 or one of its spin-offs (reliability put me off). The Bronica S2A was very attractive, but once again - quite expensive unless you went for the slightly older S2 - and I’d heard that they could be a little bit tricksy with the gears stripping over time.
Which brought me to the EC. People were scared of the EC because of it having an electronic shutter. But I’ve got two other film cameras (Olympus OM10 and Yashica Electro 35) which rely on electronics and they work like a dream. And with all my research, I couldn’t find anyone who’d actually owned one say that the electronics were crap. So the naysayers make the EC a bit of a bargain… and I went for a nice all black one!

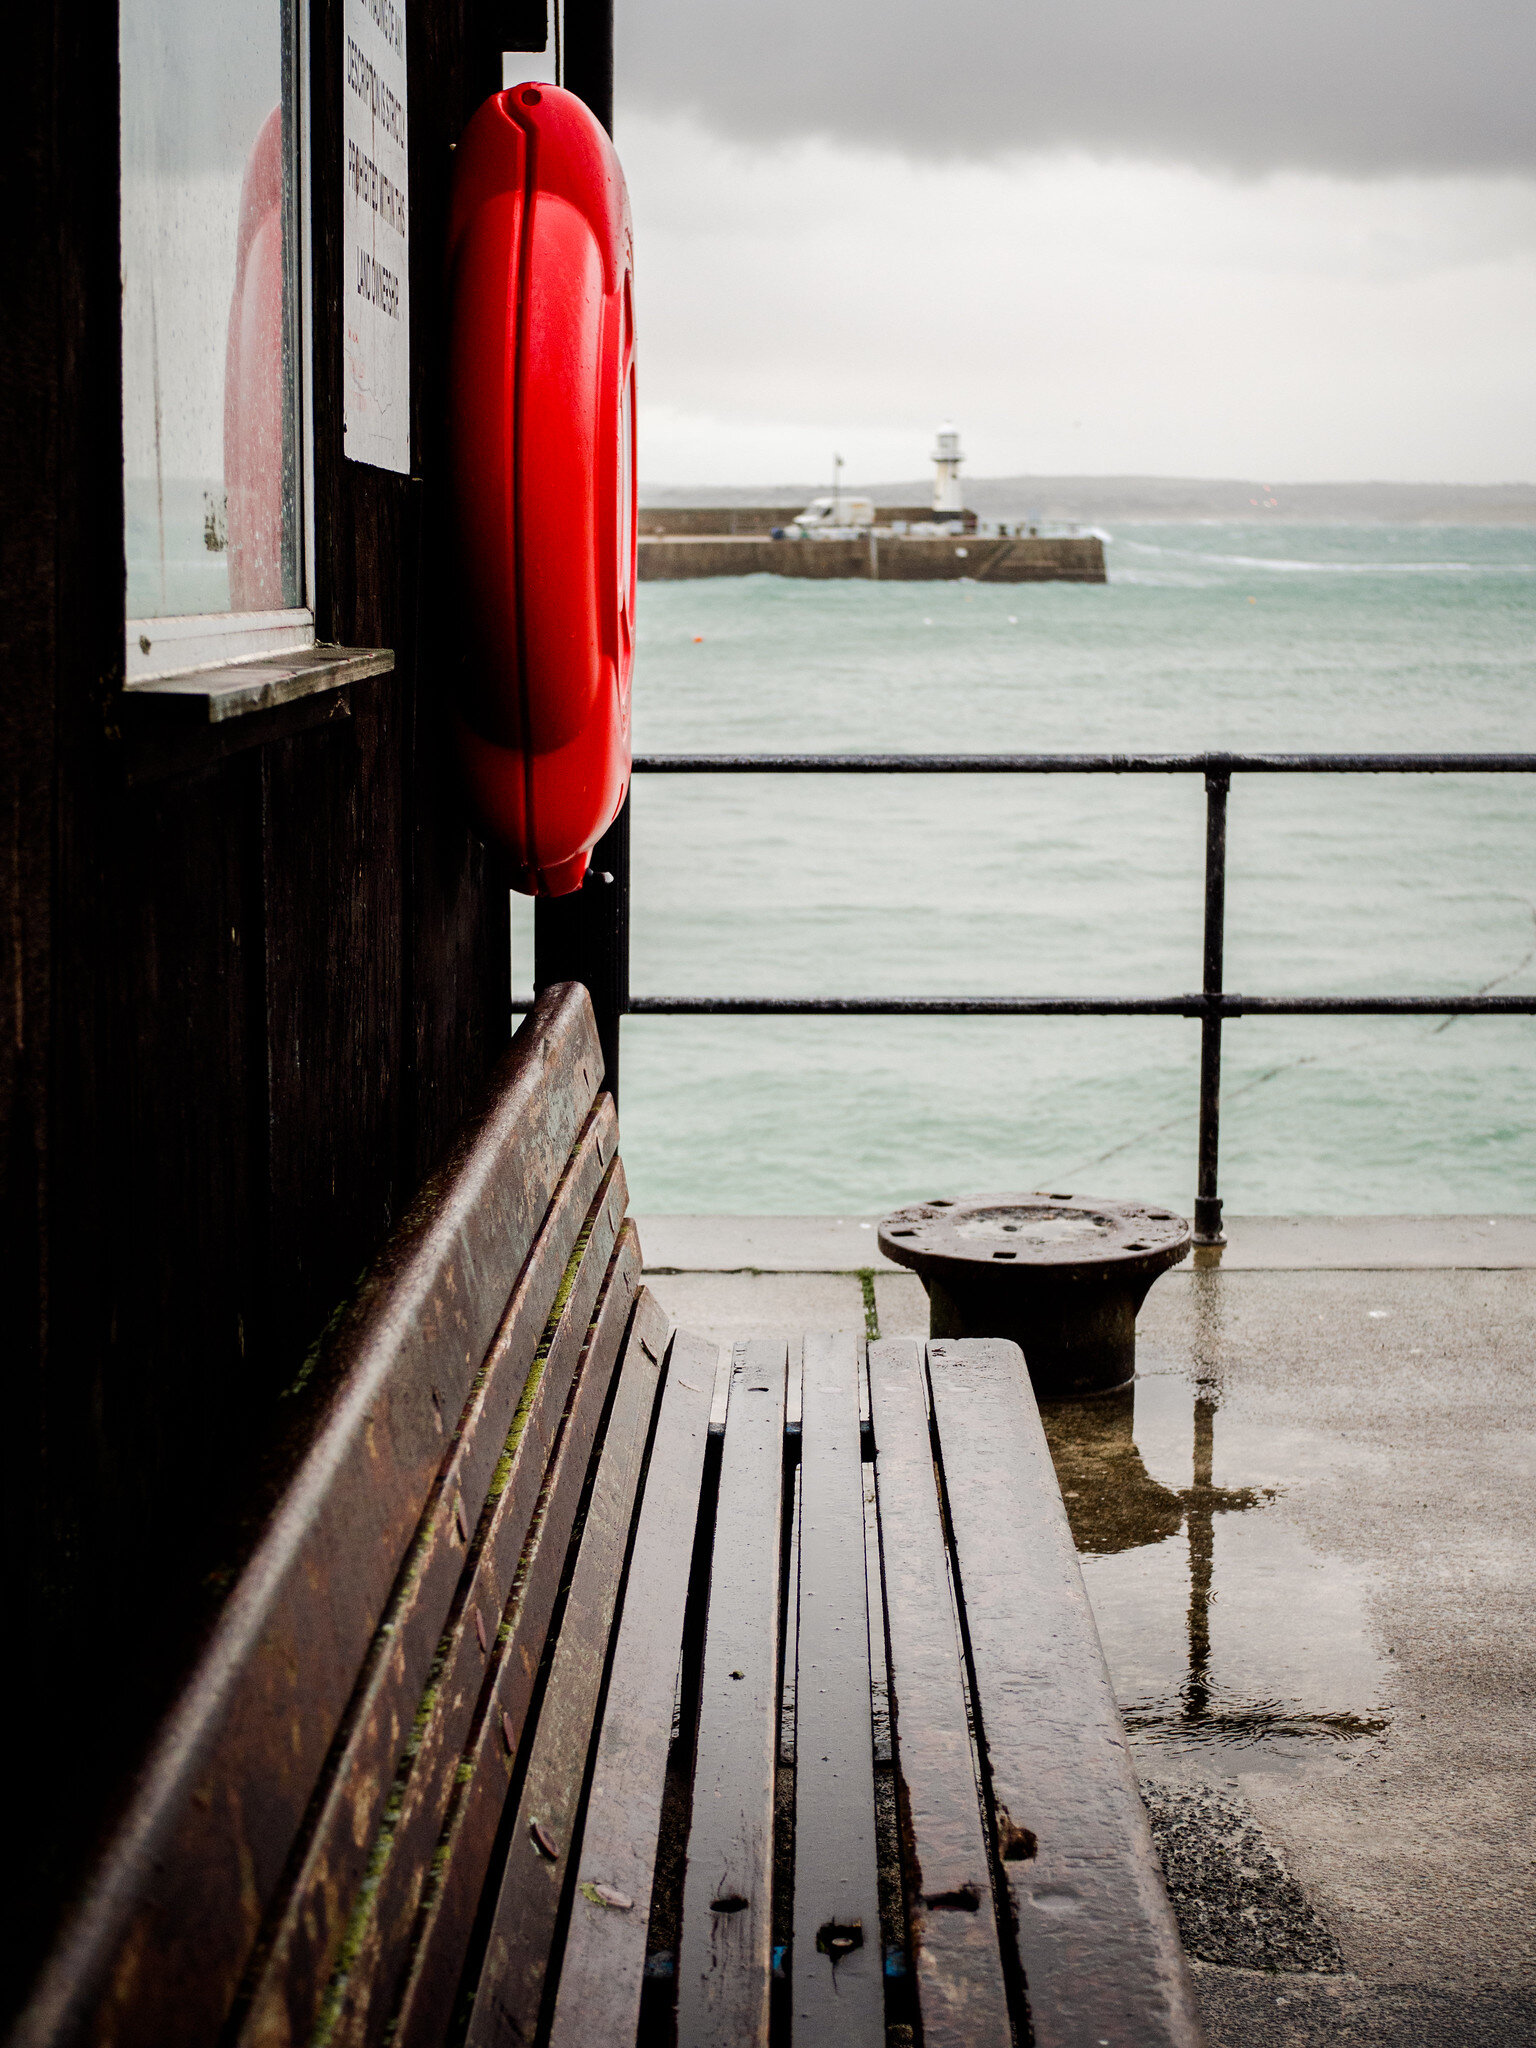
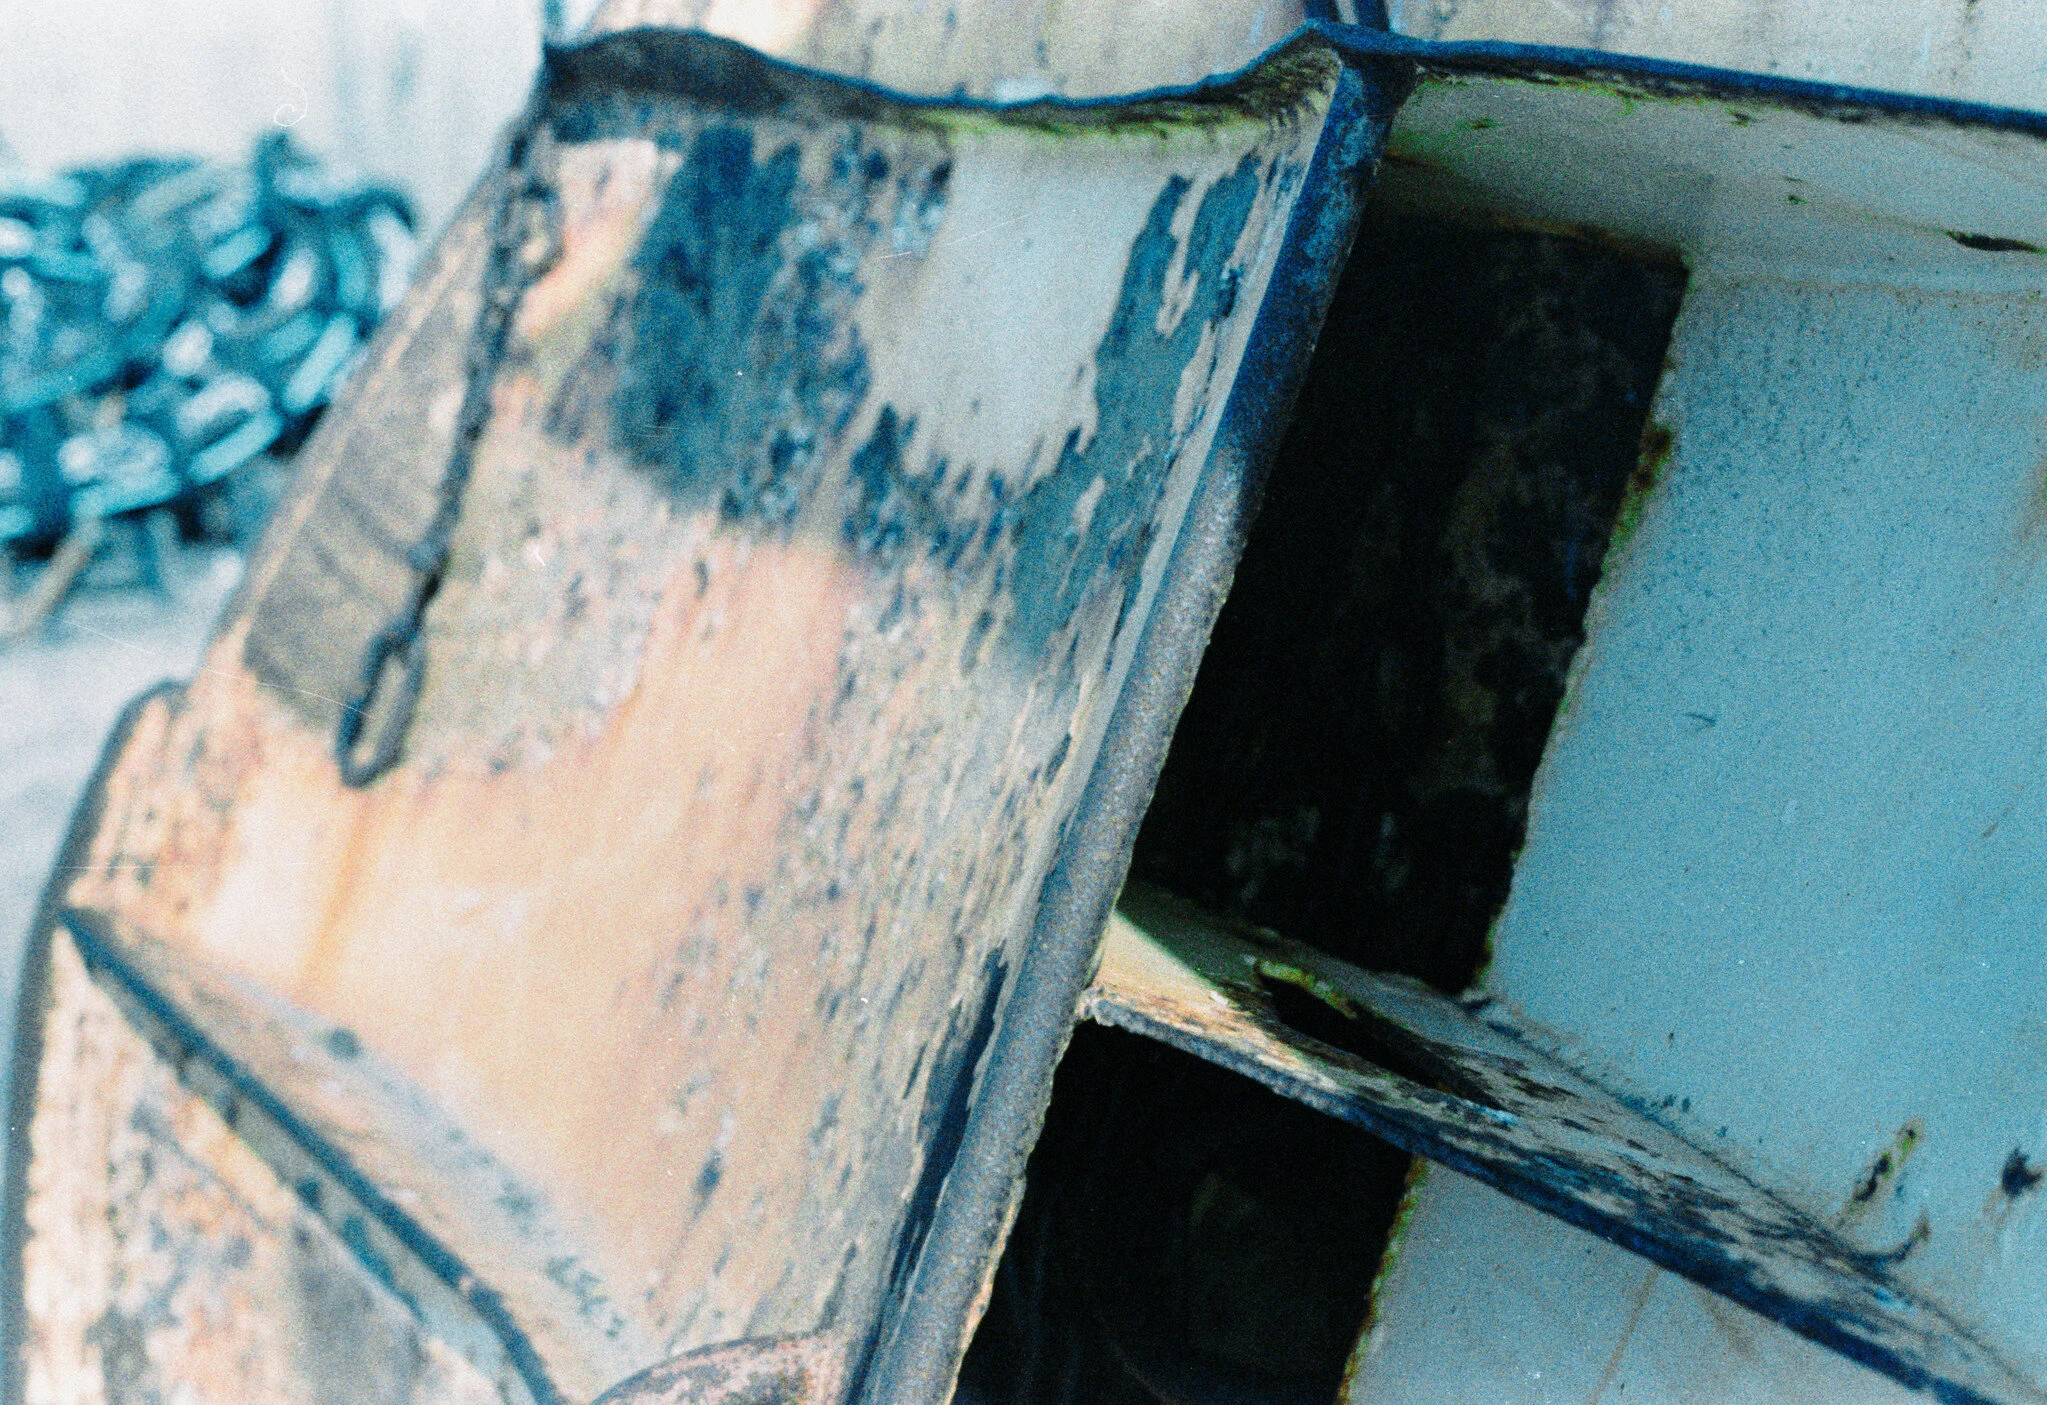
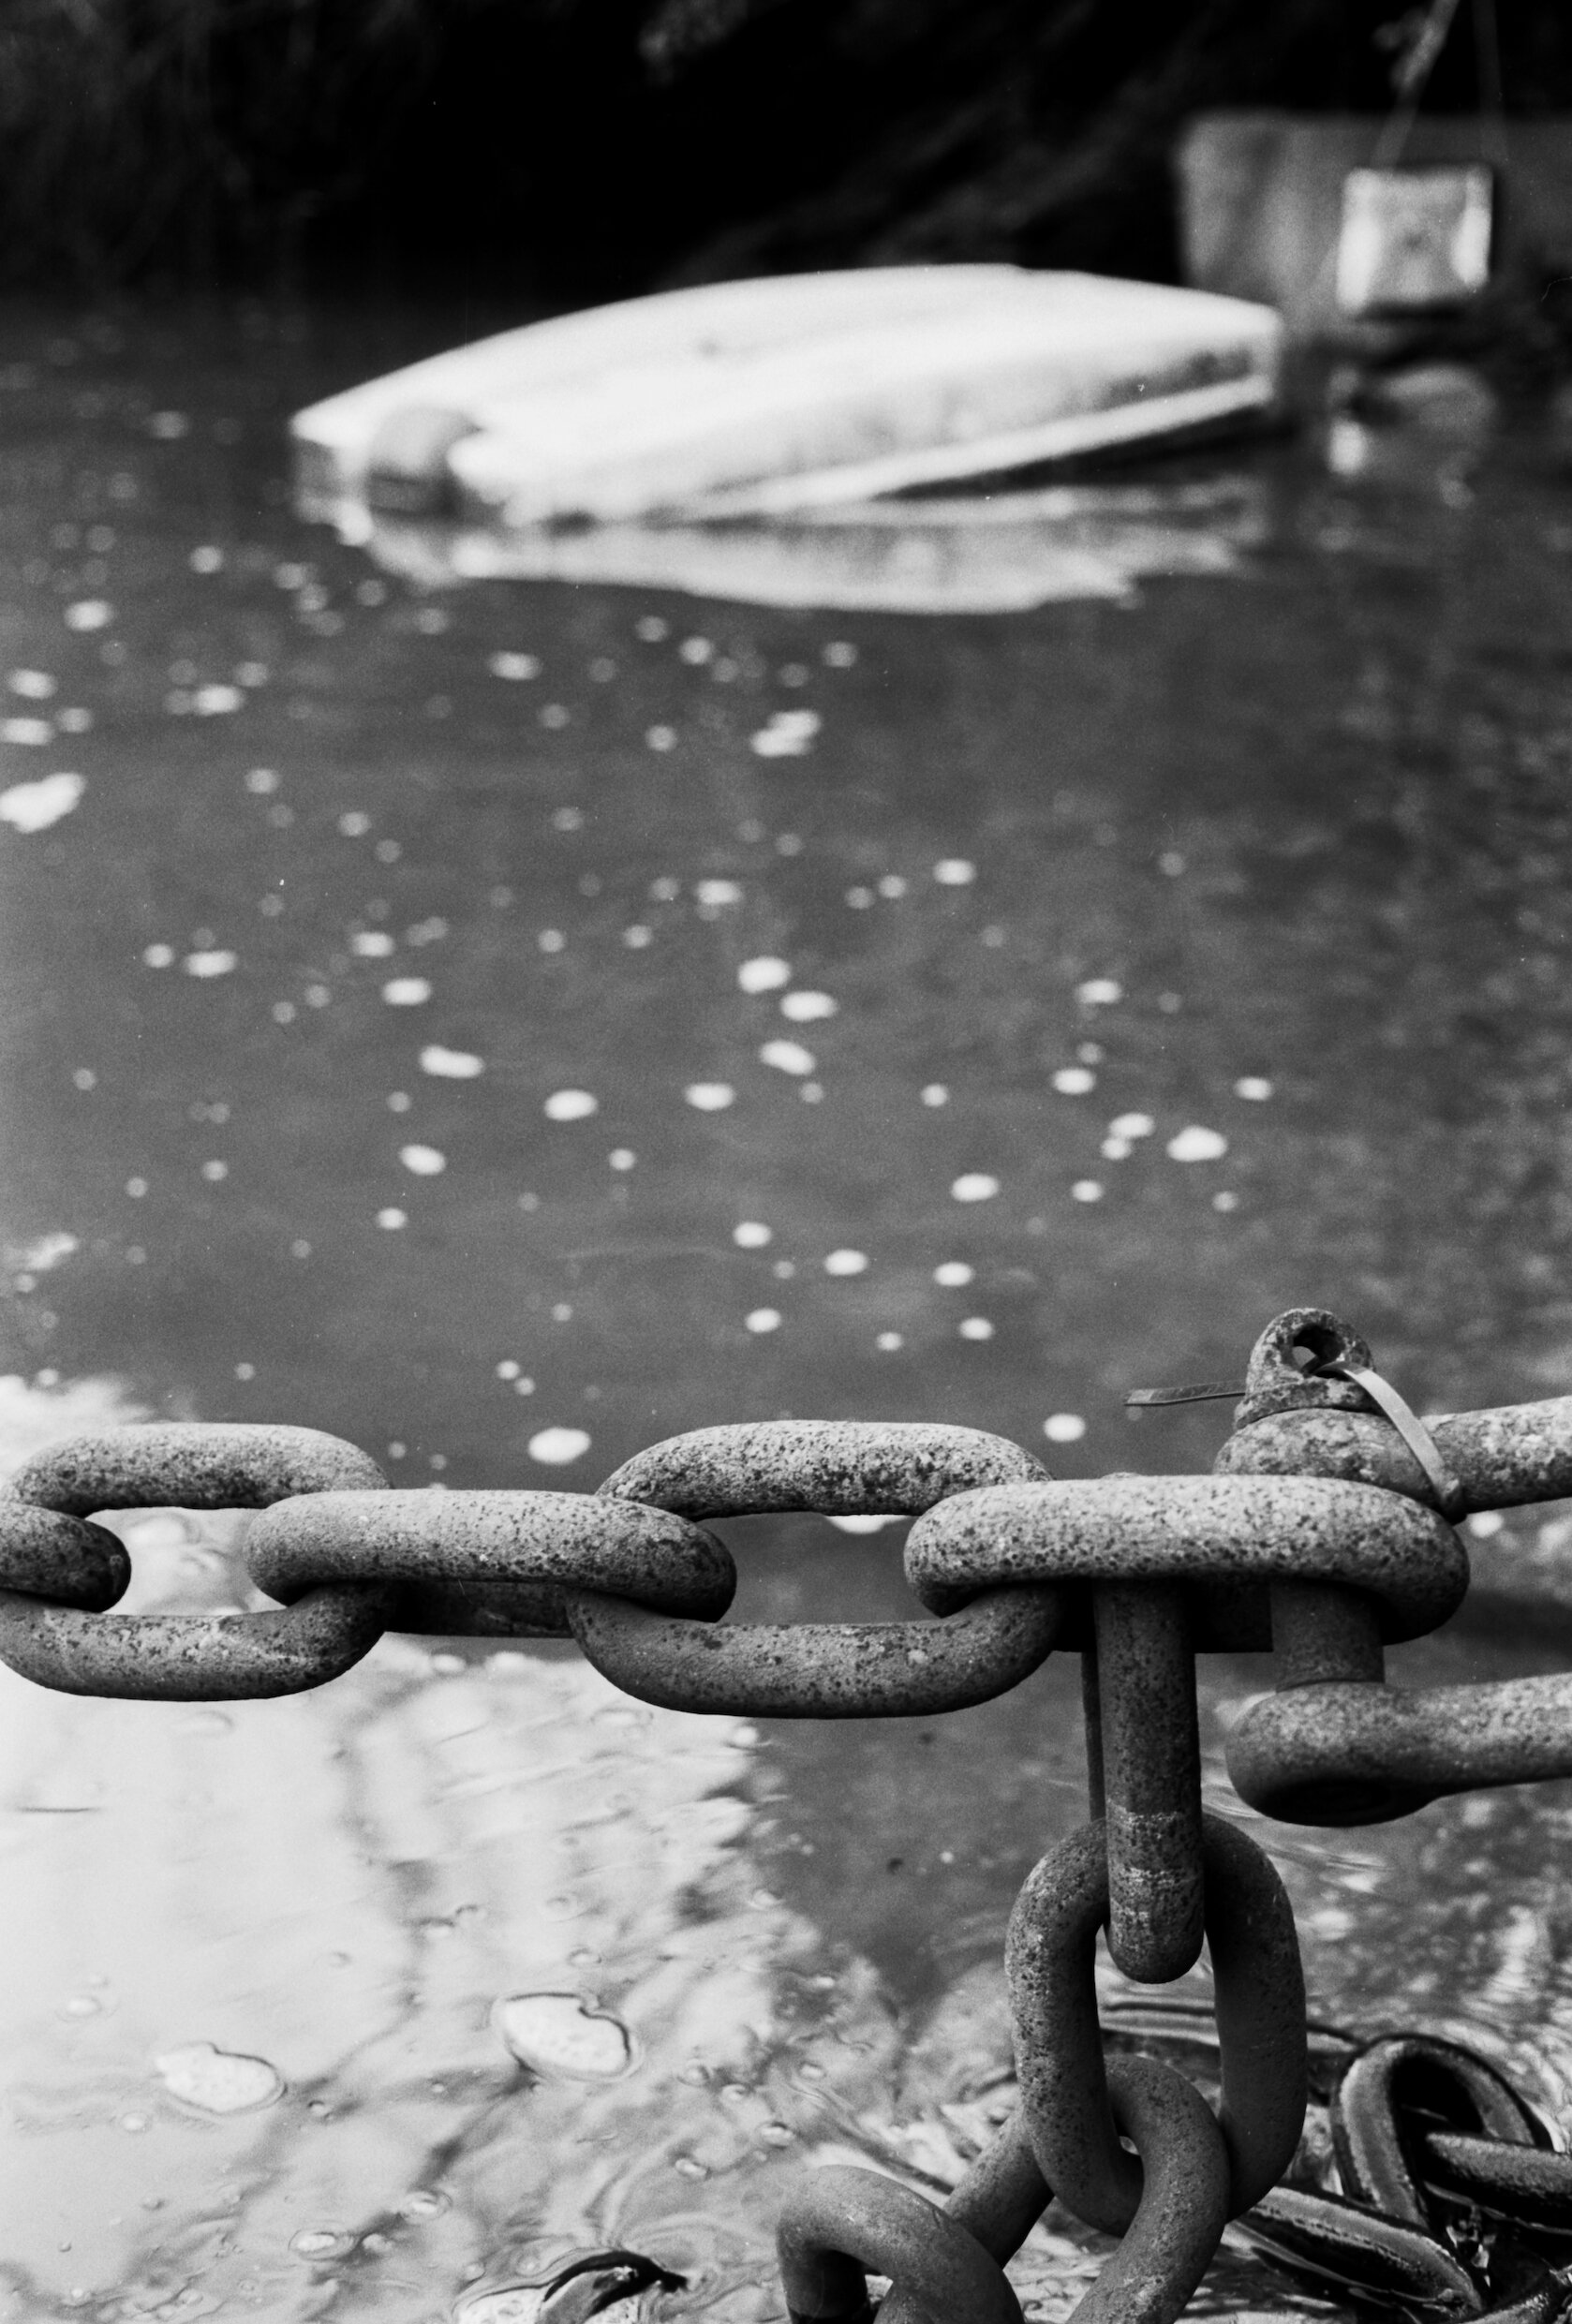
A detail of some boat rigging in Charlestown.
The first thing you notice with the EC is the weight. This is not a light, chuck-it-in-yer-bag camera. But that’s OK - I still have my Yashica 635 for lighter days. However, even though it is heavy it is a work of beauty.
And the CLUNK of that mirror! Even my wife had to admit, “Yeeeeah, that is a good sound.”
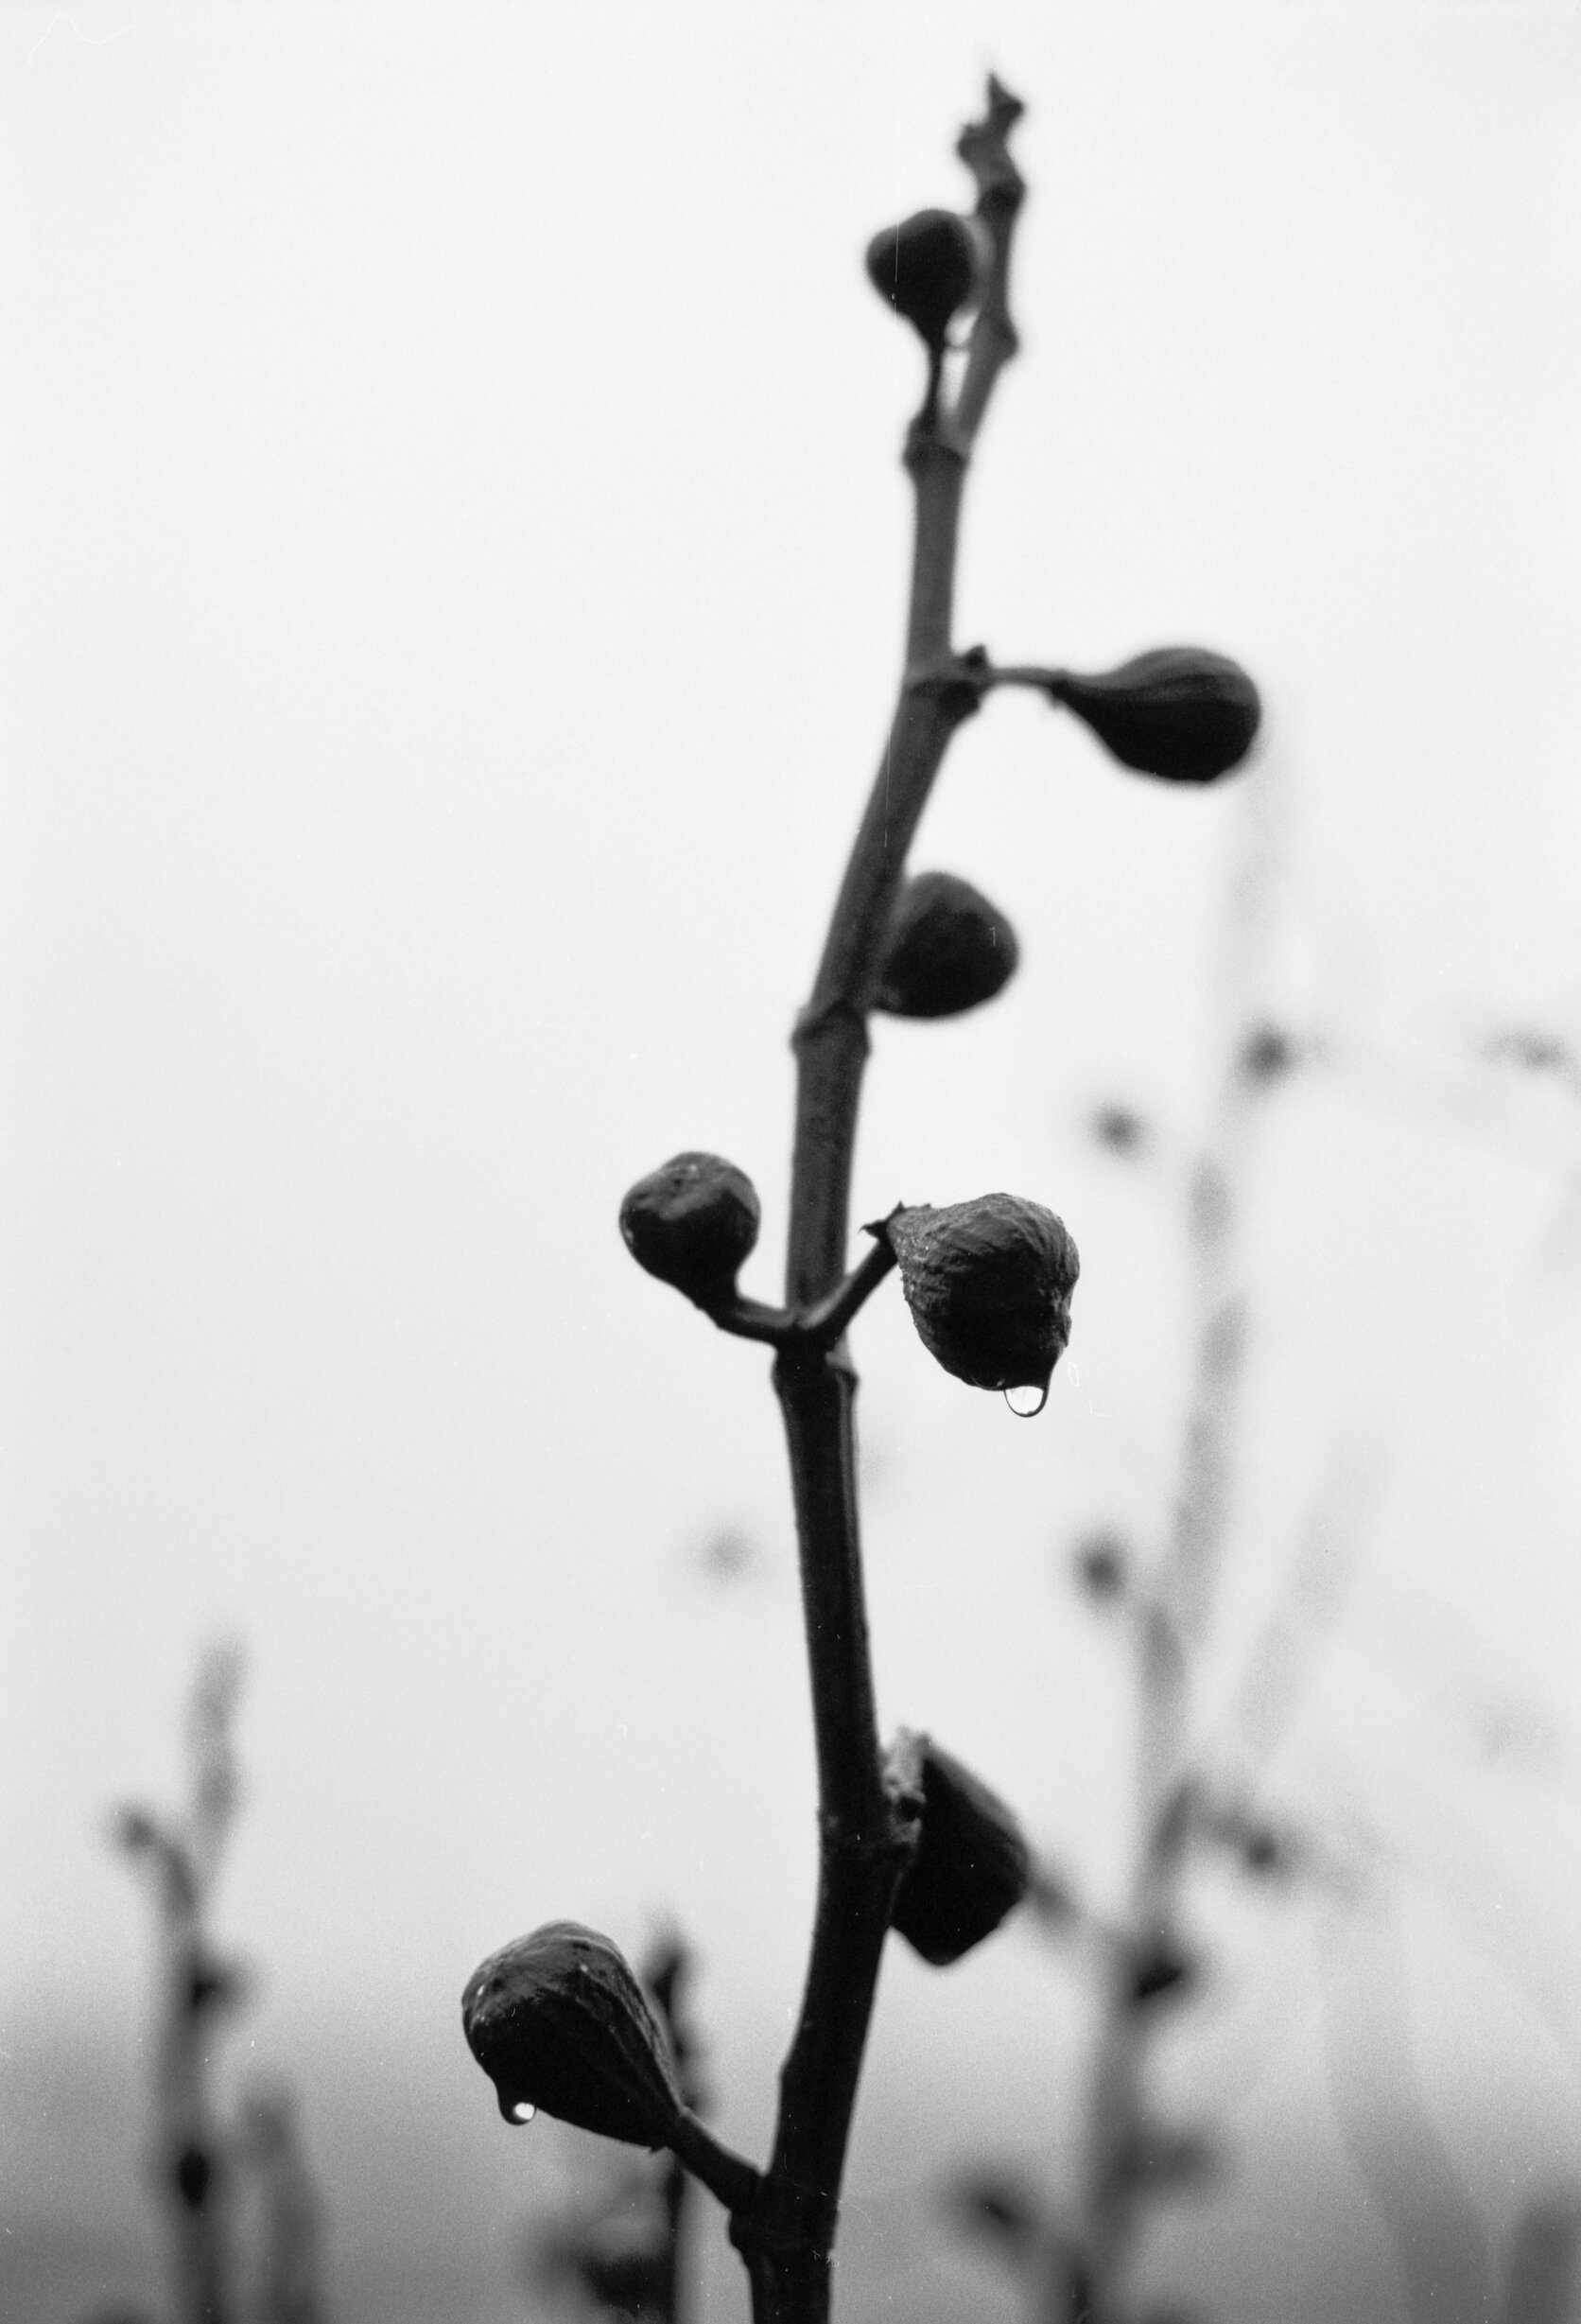
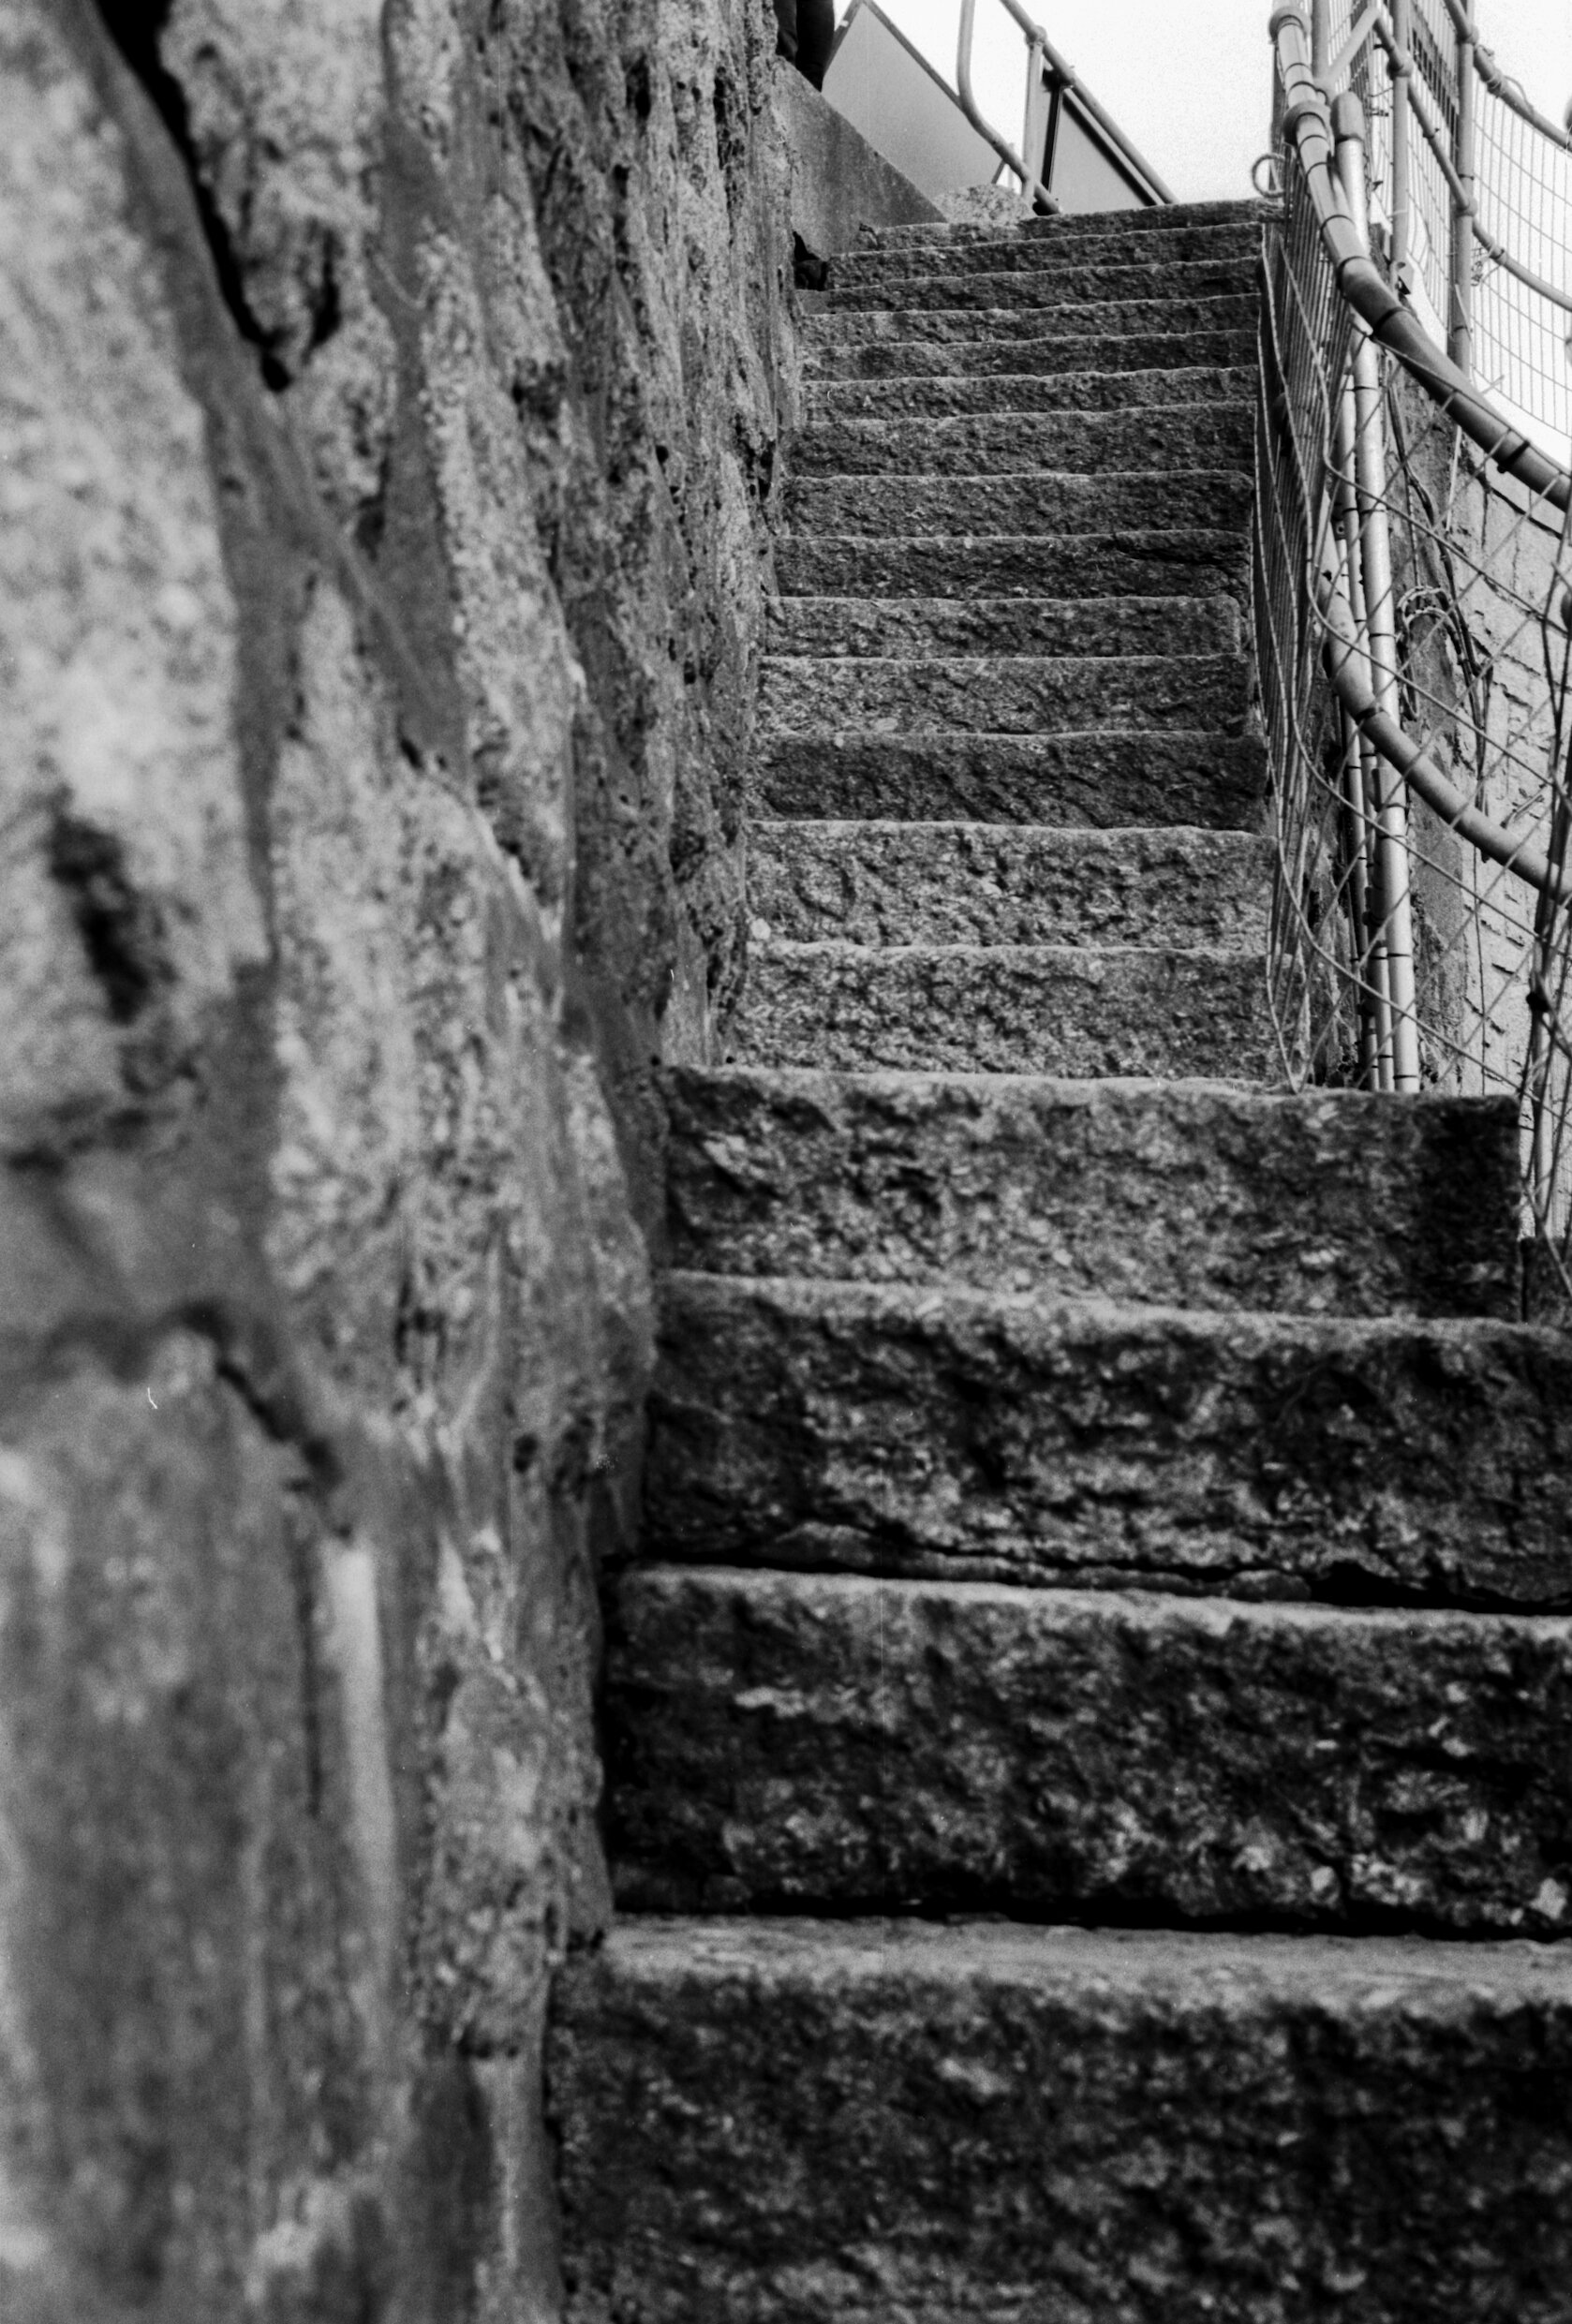
I ran a test roll through as soon as I got it and all looked good. But the proper test was going to be taking it to Cornwall for ten days on a family holiday/visiting the in-laws trip in October. I know what Cornwall can be like - quite changeable in weather, so I wanted a film that could (a) let me test the camera and (b) handle lots of different kinds of light. I settled on Fomapan 200 - a film I’ve shot with a lot. It hasn’t got as wide a latitude as some others but still perfectly workable for what I needed. Also, familiarity is always important when getting to know a new toy.
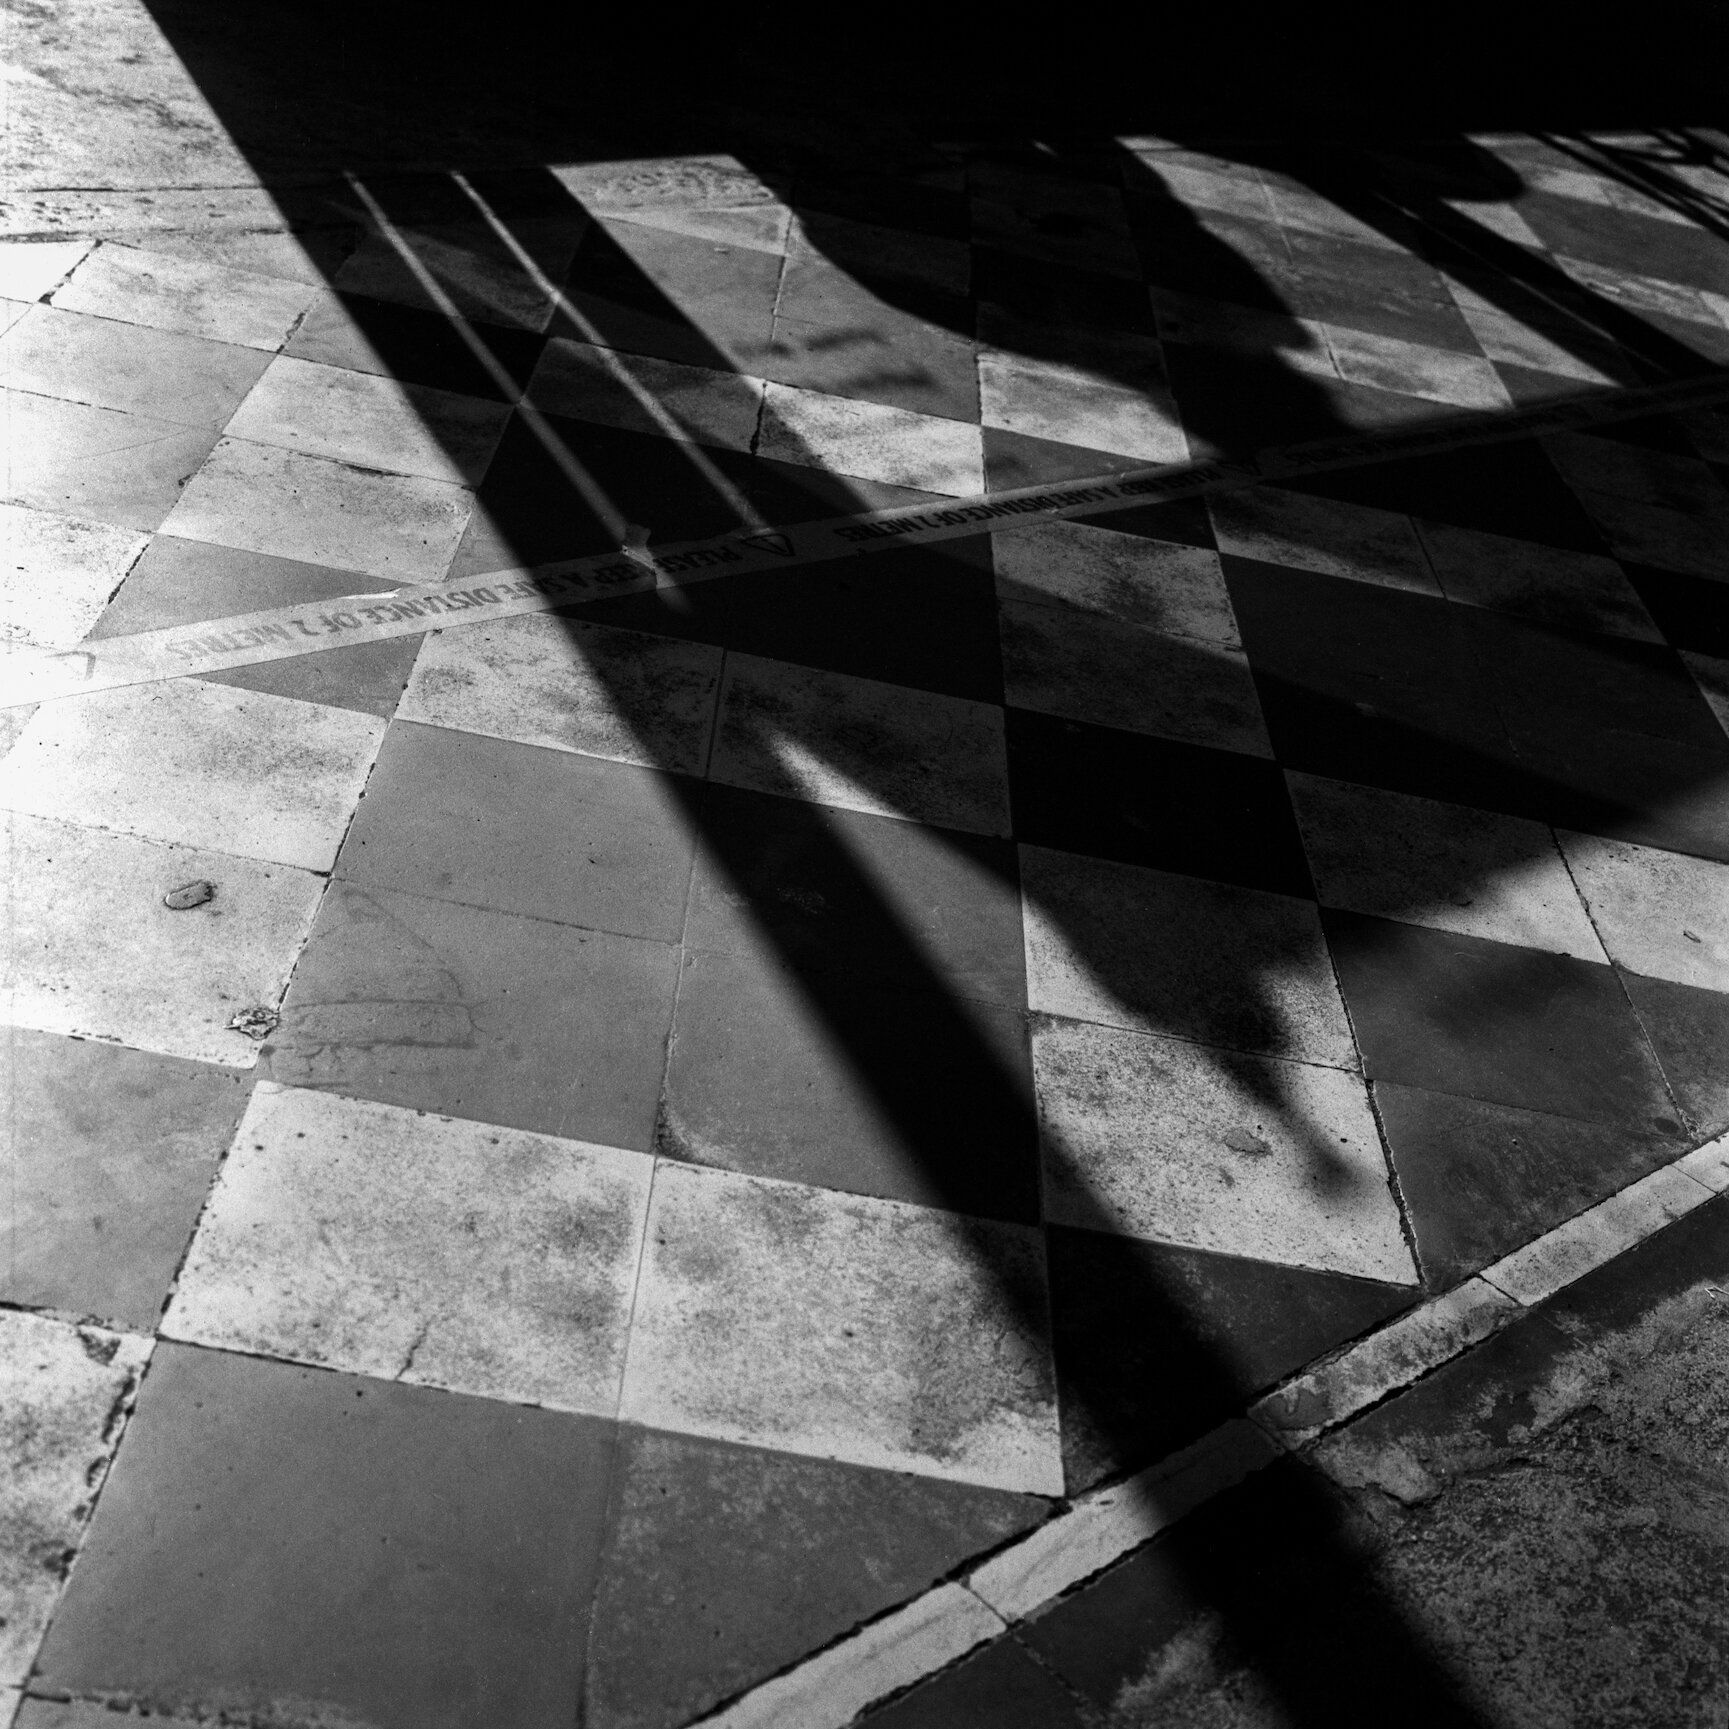
Shadows on the floor of a cafe in St Just.
Straight off the bat I was in love with this camera. Yes, it’s heavy. But after a while I didn’t notice that whatsoever. The viewfinder is stunningly bright - I found myself composing and focusing shots quicker than I’d ever done with an unfamilar camera. I was feeling so confident with it that I didn’t even meter every shot, as soon as I had a good measurement for a scene I just went for it and used my instinct.
Much as I love lighter cameras, I am thinking maybe I’ve found a near perfect camera for me. It has a phenomenal lens (a Nikkor 75mm f2.8), it feels great in the hands and - for a medium format - is quick to work with. I love the modular aspect of it - at present I’ve only got the one back but I will buy more so I can load up with different films. But further on from that I can build it with different viewfinders, lenses, grips, even viewfinder screens. It is a fantastic camera that can grow with me.
Film from https://analoguewonderland.co.uk
Dev and scans by https://www.silverpan.co.uk/

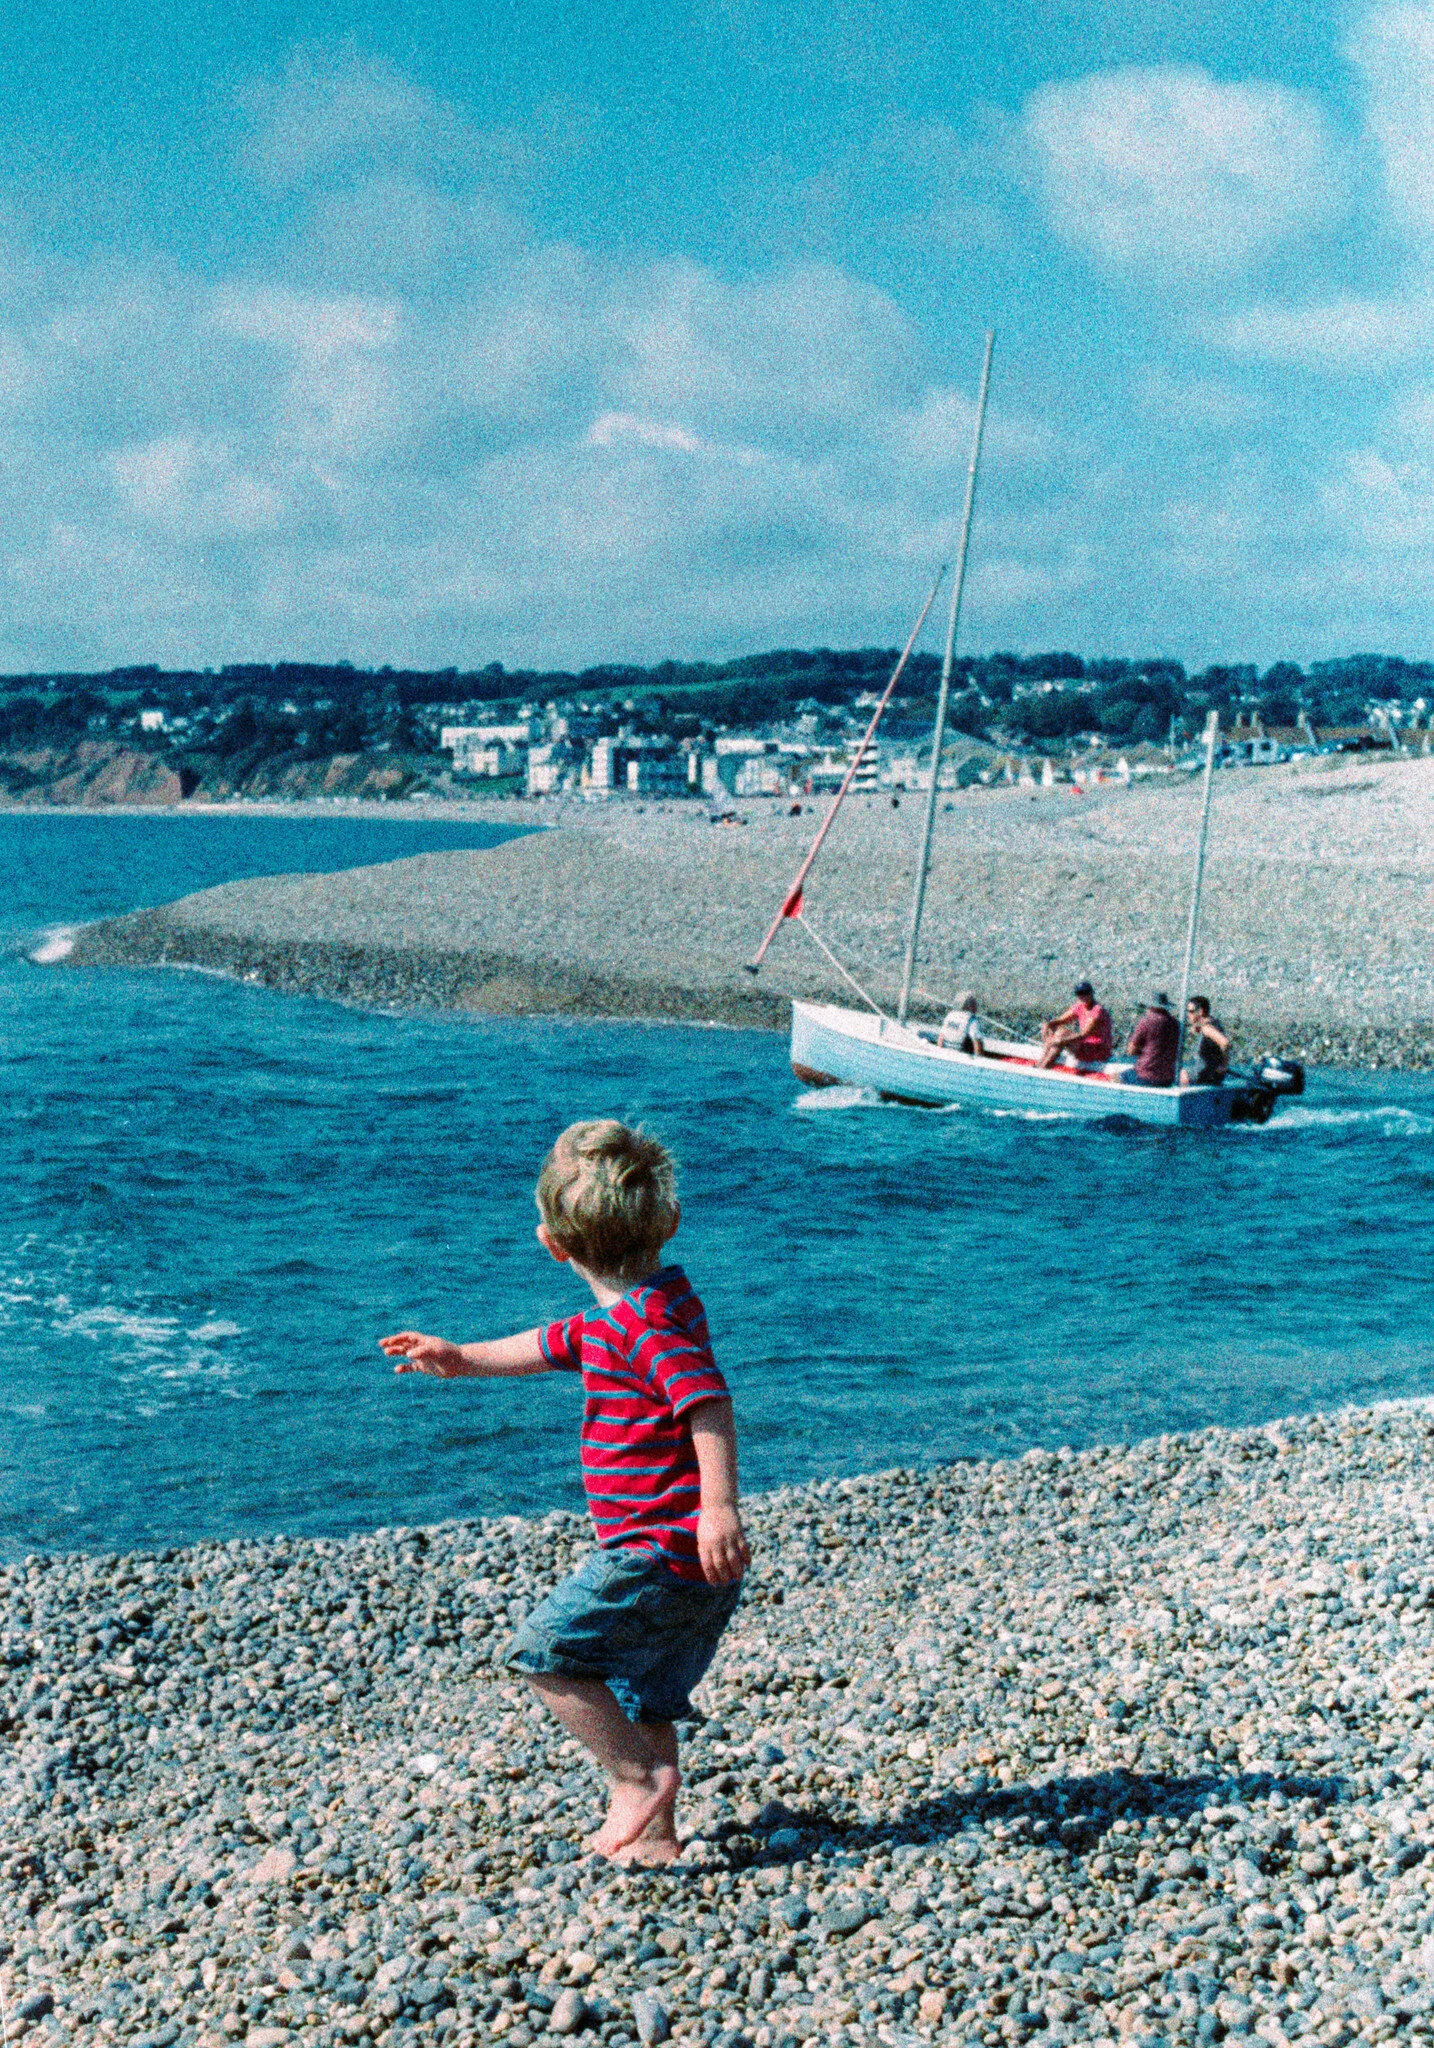
The little guy’s gonna end up in here somewhere, hasn’t he?

The quarry at Wheal Martyn. It is BIG. And I love all those textures.

Also at Wheal Martyn, a gorgeous wooded area.

One of the old railway trucks at Wheal Martyn.

Ruan Lanihorne on the Roseland Peninsula. Losing the light whilst metering on something quite delicate.

Waiting for the King Harry Ferry back over the River Fal.
A nostalgic look
It is AGES since I last posted anything on here. January…. and how things have changed since then!
I’m not sure how I didn’t get round to posting a few things during lockdown as I’ve not been slowing down with my photography whatsoever. I finished my 365 project at the end of February (I’m still working on the book of that) and decided that I was going to start experimenting with some more film stocks in 2020.
And then Covid came along.
I’ll post in more length about my Covid photographic adventures soon. But let’s just say that I did get a chance to experiment. And I’ve tried a lot of different emulsions, which has been fun.
But this particular post is about some expired film I bought a while back from Analogue Wonderland. It is Agfa CT Precisa 100 slide film. Analogue Wonderland recommended shooting it at box speed and then cross processing it.
I bought two rolls. This first roll was shot over one weekend in Lyme Regis and Axmouth. The other roll has been waiting to see how successful I’ve been with the first.

Firstly, this stuff comes out grainy. And very, very blue - although the red does pop out as well. I’d read a couple of places that yellows really pop too, but not with my experience with this roll. The cyan/blue was very dominant once scanned - I had to back off the saturation of the cyan in Lightroom quite heavily. Obviously I knew I’d get bonkers colour shifts but I still wanted it to be in a reasonable ballpark.
To begin with, I was a bit disheartened as all I could see was that grain and the completely way-off colours. And started to question why I’d not shot the Kodak Vision 3 50D I also had with me for the weekend. It was perfect weather for that lovely film.
But after a while I started to quite enjoy the look of the Agfa. It gives off a nicely nostalgic feel - even more so with shots of my little ‘un. That could almost be my young self at his age on that beach. The film really does have the feel of the turn of the 70s/80s.
I’m now wishing I’d bought more than the two rolls. Might have to start hunting for some more…!


Ilford Ortho Plus
There was muchos excitement all around when Ilford released this orthochromatic film a couple of months ago. And not wanting to miss out on the party, I grabbed myself a roll from the wonderful Analogue Wonderland.
The talk was of fine grain, nice contrast and excellent tonality. And it did not disappoint…
This film is amazing. It has absolutely gorgeous tonality with near non existent grain in the right light. The contrast is spot-on. Being an ortho film it doesn’t react to red whatsoever, so skin tones are dark. But for landscape and detail-type shots - YUM YUM YUM!!!!
As usual when I’m trying out a new film, I stuck my roll in my Oly OM10. I think all of these shots were using my Zuiko 50mm f1.8 lens. Mostly shot in Cornwall over the Christmas period, the weather wasn’t great - gloomy, misty, rainy…. but the Ortho took everything in its stride. It really captured the atmosphere.
It ain’t the cheapest of films. But it really is worth it as it’s quite special.


Film developed by Silverpan Film Lab.
365 Challenge - into the final two months...
Two months to go. It feels a bit like the last couple of miles in a half marathon - almost there but still needing to push on for that bit further yet. No relaxing too soon!
I must admit, I have been finding it quite hard recently to try and get interesting shots around my home town of Bath. Sometimes no matter the difference in the people in a scene, it feels like I’ve already covered certain angles and views before. But having to try and force myself to find something unique is part of the challenge.
I’ve been away for Christmas and had a two week break from being in town. So I’m hoping I’m coming back with fresher eyes for these last two months of the challenge.
In the meantime (and as it was August I last made a 365 post), here are some of my faves over the past few months. And the full set can be seen here on Flickr.


Bergger Pancro 400
Bergger Pancro 400 is a film I’ve been wanting to try for a while and I recently got a couple of rolls - one 35mm and one 120. I haven’t shot the 120 yet, so these thoughts are going to be about the 35mm.
Pancro 400 is made up of two emulsions. Bergger say this gives a very wide exposure latitude. However, I had read that if you overexpose the film then one of those emulsions gets grainier than the other - the grain appearing in the highlights. Because of this I planned to shoot at box speed for my first test of it.
But as with all good plans, it didn’t quite work out that way. I decided to shoot it in my Yashica Electro 35 on a relatively overcast day at Rockaway Park near Bristol. Rockaway is an old scrapyard which has been taken over by a group of artists - shipping containers are used for studios and there are loads of random rusty old things around the place, from Trabants to rockets via carved up metal signs. You know that besieged oil refinery in Mad Max 2? Well, it feels like you’re in that but with more trees.
Anyway, it was overcast and looked like rain. So I figured shooting at 400 was fine. And then the sun came out. And back in. And out again. So to give me a bit more control for when the sun was out, I rated it at 200.
And yes... I can confirm that the highlights get quite grainy!
At first I was unsure but as I scanned more shots in, I started to quite like it. It has quite an old look, and certainly one that is quite unique - the blacks are nice and clean and the grain becomes more obvious as you move up through the tones.
And the tones are very nice! Superb gradations and a lot of detail too.
I’ll be interested to see what happens when this is shot at box speed - I’m planning on doing so with the 120. So I may have further thoughts about this film in the future…


7Artisans 55mm f1.4
I’ve been keeping an eye on the 7Artisans lenses for a while now but only recently decided to take the plunge for one. Having researched the various options, I went for the 55mm f1.4, which on my Olympus equates to 110mm on a full frame camera. This moves me into a bit of a telephoto area (although pretty much the same focal length as some of my vintage lenses such as the Zuiko 50mm and Helios 44-2).
Anyone who might stumble across my ramblings on here will know that I like putting vintage lenses on my Oly. However, once the adapter is on the camera with an old, sturdy piece of glass…. it gets kind of heavy and cumbersome at times. So I wanted to get something in the 50mm area which would be a native lens - small, well built and light.
Both the 50mm f.1.8 and 55mm f1.4 looked good. But which one? Slightly different focal lengths and slightly different max apertures. Do I need f1.4? Hmmmmm…
My decision on the 55mm came down to this:
I don’t tend to need the f1.4 aperture but it’s there if I want it.
The 55mm was a little closer to my Helios which I’ve been enjoying working with recently.
The minimum focus distance is closer.
I think overall, it just seemed like a slightly more flexible lens.
7Artisans have now got a distributor in the UK, so no more need for buying over eBay. Service was excellent - good response to emails and quickly dispatched lens. The lens arrives in very nice packaging. This does not look like some a cheap lens and on first picking it up, it doesn’t feel it either. A nice solid, metal lump in my hand. A reassuring weight without being heavy.
One concern I’d had before buying was the aperture ring being clickless. A couple of my vintage lenses are clickless and they are too loose - I never know where my aperture is set. No worries here; the aperture ring is very nicely damped so you have to be quite decisive in adjusting it. And I’ve not knocked it whatsoever once set. The same with the focus ring - just the right amount of give to allow for quick, snappy focussing.
Just so you know, this review is not going to be overly technical. I’m not a pixel peeper. I’m more interested in making images than dicking about checking if the corners of a picture are perfectly sharp after zooming in 100x. That said, here are some shots before my thoughts on using the lens in the real world…


I’ll start by saying that I gelled straight away with this lens. It works really nicely for my style of photography.
There were some shots I missed my focus through not being used to the focus ring, but that’s just down to practice. Overall I was getting nice shots within an hour.
The colours look great. Nice and natural with good contrast. I usually shoot aperture priority and dial my exposure compensation down 1/3 - 2/3 of a stop and everything was coming out of the camera great. Once into Lightroom, I just added a little bit more contrast, sharpening and saturation to my taste and I found a lovely pop to the shots. If anything, it might saturate the greens a little bit; but nothing I couldn’t pull back a bit.
I’d not shot with an aperture as wide as f1.4 before but gave it a go to see what it could do. Depending on the subject, it is quite hard to nail focus perfectly when that wide. And even the shots which were shot that wide open and had a good focus point were a little soft. Not offensively so - still useable, I just wouldn’t be able to fool someone I had a £1000 piece of glass on the camera. It also has noticeable chromatic aberration at wider apertures. These were easily cleaned up in Lightroom, but were noticeable without even needing to zoom in. This is being picky, though. Because having an f1.4 lens at this price is not going to be perfect.
Stopping down to about f4 definitely solves all that, though. Like many MFT lenses, this is the sweet spot. And it looks gorgeous. Plenty sharp for me and with lots of character. This is where I really started enjoying it.
As a manual lens, it is definitely one of the easiest I have used for focussing. On a par with my Zuiko 50mm and Panagor 35mm. If I need to grab a shot quickly, is it as fast as autofocus? Probably not. But it’s a lens for taking a bit of extra time and effort to get the shot - something which is suiting how I’m shooting more nowadays. Compose, nail your focus and fire away.
I’m really loving this lens. It’s very much like a vintage lens in the way it feels to use and also in the picture quality. It’s not pin sharp like some modern lenses, but it allows me to capture natural images with character. It’s excellent. And a bargain at the price. Snap one up whilst you can.
Here are some more images….


365 Challenge - the halfway mark!
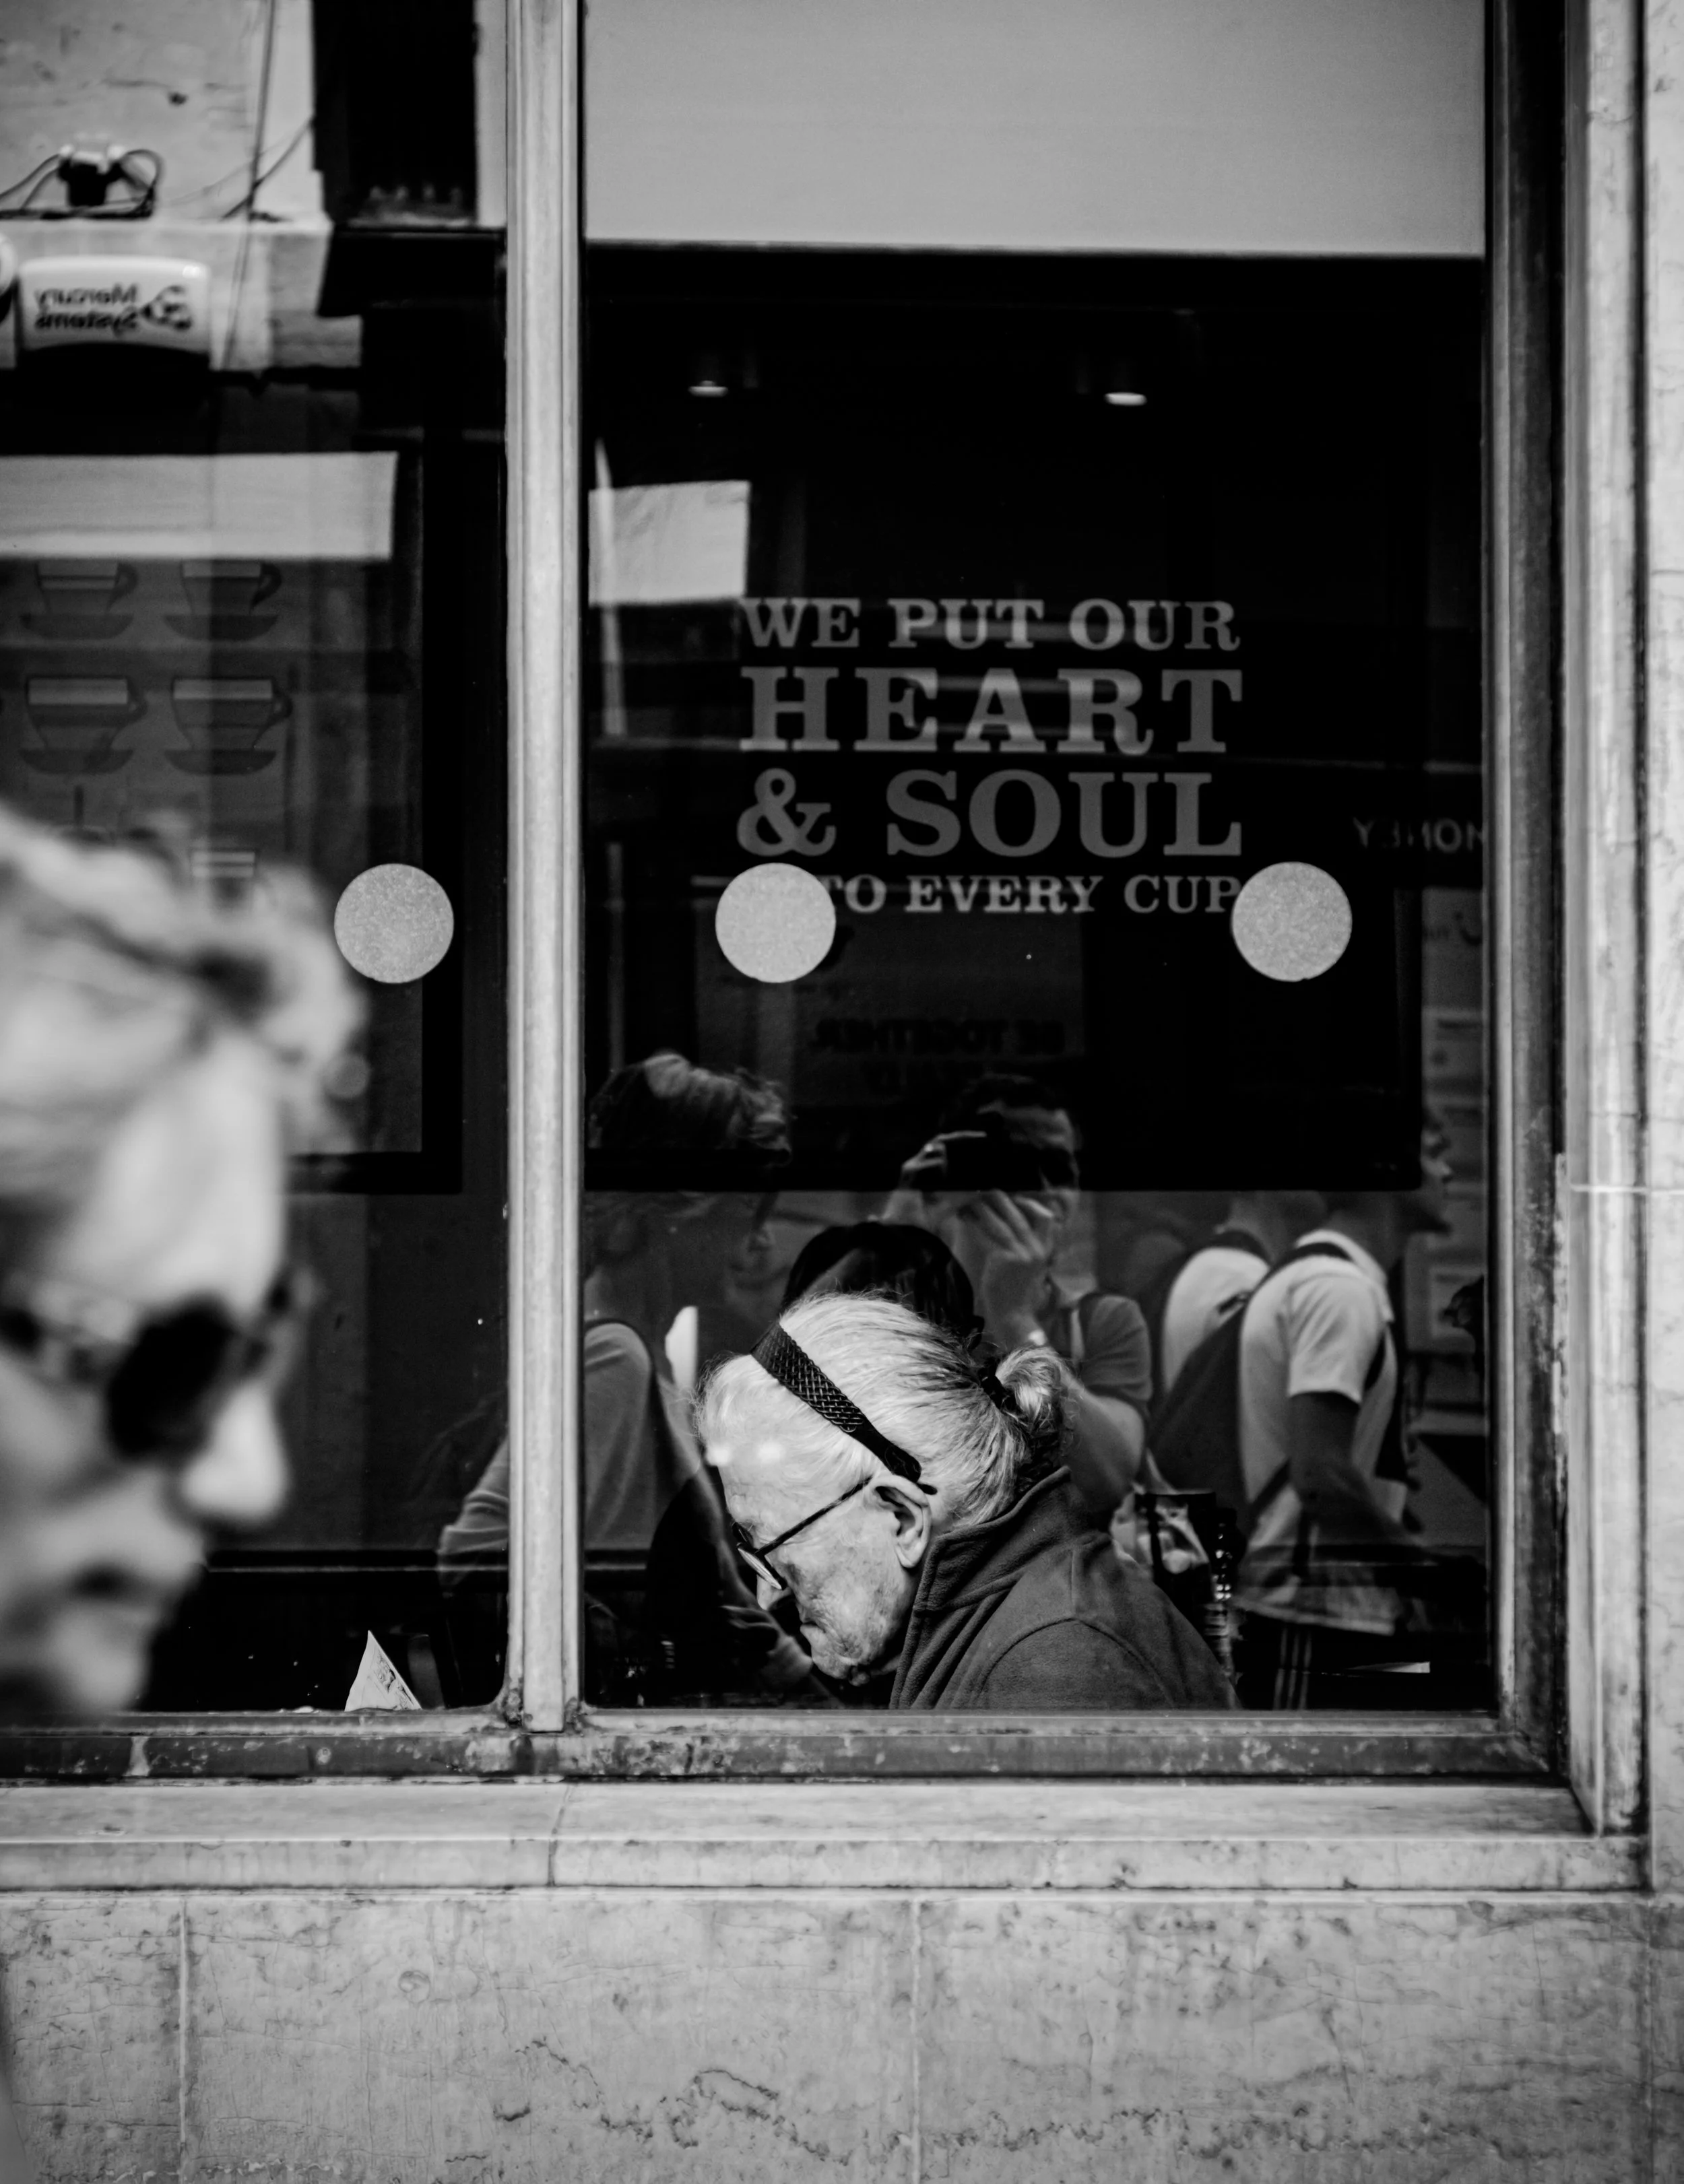
I’ve suddenly realised that today was a milestone in my 365 challenge. I’ve only gone and hit the halfway point!
It being a leap year next year (and me ending the challenge at the end of February), then the 365 challenge is actually 366 shots. So today’s image #183 is the milestone!
There’s been a variety of reasons I’ve gone for a particular shot each day. Sometimes something has just been asking for it out of many photos from that day, sometimes it’s the only shot I’ve got that day. Sometimes it has been an interesting face, sometimes it has just been an interesting composition.
I think this one falls into the latter category for me. It’s probably not my best photo ever but I like the old woman’s face (which is what I first noticed) with the sign above her. I also like her being framed by the window, the different textures within the shot and also the random face appearing on the left. I wanted someone to appear in that space and was quite pleased when it was just half a face.
This was on my trusty Oly Em10ii with my 7Artisans 55mm f1.4 lens.
Standing in the middle of the road.
Silbersalz35 - an update!
As all you millions who read this will know, I’ve been quite excited with using Silbersalz35 film over the past few months. It is bloody awesome.
But my favourite emulsion from my early tests was the 50D. And Silbersalz recommend overexposing by a stop. Which makes that a 25ISO film. Eeek.
Now, I like my history when it comes to photography (in fact, anything creative - I didn’t spend all those years at art school for nowt) and know that the old masters didn’t have the luxury of our modern high speed films, but those long exposure times do leave me a little bit nervous. I dont mind a bit of motion blur but…. I’m exposing at 25ISO!!!
I don’t tend to use tripods so a slow speed film means I’m wanting good light. This is why I’ve held out on using the 50D film properly until the summer…. but who can rely on the weather, eh?
Anyway, I thought getting a batch of four 50D films for my holiday in Spain would be a good plan.
I decided to use this batch of Silbersalz in my Yashica Electro 35GT. I’m still getting to grips with this camera so was unsure about how experimenting with film and camera at the same time would work but…. I shoudn’t have been worried.. It worked out bloody awesome! And it’s been a good learning experience for both camera and film…
The film is gorgeous. I’ve never seen a film with so little grain. And with the exposure latitude it has, I can do whatever I want with it and it still doesn’t get grainy. It obviously helps with Silbersalz making such good high res scans - they are exceptional, but the film itself is second to none.
As far as the camera goes… well, this is the first proper test for the Electro 35. I’ve used it here and there since I got it a few months ago but decided to dedicate it to the Silbersalz this time. And it looks great. I played around with precise focussing and zone focussing and this camera is just awesome. I might have to write a proper review when I get time, but for now…… the Yashica Electro 35 is a great camera and everyone should have one!
Anyway…. Silbersalz35 50D with a fantastic camera. I shall leave you with some results…


365 Challenge - FOUR MONTHS IN ALREADY!
Wow. As the heading of this post says…. I’m four months in to my 365 challenge. I’ve been meaning to make much more regular updates than I have but… y’know… life, photography, and a crazy small man knock things for six!
Anyway, I’m still doing it. Some days better than others (which I expected). Some days have been a bit ‘meh… it’s the best I could get today’ whilst other days have given me a shot that has got in an exhibition! (More info on the latter when dates etc arrive in my lap!)
I’m 1/3 of the way into this and it has already changed my way of working. I'm definitely looking out for shots constantly; sometimes seeing a scene with good light and waiting for the right person to emerge into it. Or sometimes I’ll see something and think “that will work better in the right light… maybe I’ll check back later or tomorrow”. I’m still sometimes getting shots that are just instant things that I’ve noticed, but I think I’ve slowed down and got a bit more layed back about those too.
I’ve got over a bit of a ‘hump’ of worrying about getting my ‘shot of the day’. For example, one day I didn’t find much of worth to take a shot of. I can’t remember why - I might have been shooting on film and forgot about getting something for the project on my phone, or I may not have been in the right headspace, or just nothing worked right. These things happen. So I just reminded myself that these photos didn’t have to be of random strangers; they could also be about my life.
So I thought I’d get a shot of my beautiful little man just as he dozed off to sleep.
Most of the time I do sleeptime with my MiniMe. Sometimes it’s frustrating but most of the time it’s funny and ridiculous. And no matter how much I should be calming him down, it ends up with him honking my nose and me laughing my head off at him. Yeah, yeah… bad parent! But those kinds of funny moments get him to sleep and to look gorgeous like here… (yes, I am very baised!!)

Anyway, I’m digressing. What I’m learning is to just let go and just take photos of what occurs during that day. It may be something bizarre on the street, or it may be something daft at home. It all counts!
Another thought: through concentrating on monochrome, I’ve also noticed a difference in my colour photography. The colour work has become more tonal too. So there is a lot of change going on with what I do, which is very exciting for me!
Here are some faves from the recent past….


Night street photography workshop
On Saturday night, I decided to skip watching Eurovision and get myself over to Bristol to attend a night street photography workshop with Edo Zollo (organised by Wex Photo Video). I’ve not shot a massive amount at night and this seemed like a good opportunity to get some hints and tips from someone who is making some great work in the dark (I’d recommend checking out his work www.edlondonphotography.co.uk).
There were 13 of us in the group, all with varying experience in terms of how long we’d been shooting and also what kind of work we’d been producing. There were landscape photographers wanting to try something different, someone who was just beginning with their photography (although from what I saw they did have an eye for a good shot), motorsport enthusiasts used to working with long lenses, and a couple of us who were already used to more street-orientated work. So it made for a mixed bag of people.
After introductions and a natter over our kit and a drink, it was time to head out into the night.
Edo had been scouting out locations already and had found some dark alleyways around the Lewins Mead/Christmas Steps area. We were looking for capturing shadows and light - usually one light source and seeing what that gave us.
From the outset we were to try and get all our shots manually. No cheating with auto ISO, exposure and aperture. We were testing ourselves to get these shots old-skool. I did go a bit overboard and thought we were meant to be manually focusing everything too… and after finding out I was in the minority doing so, I thought I’d carry on just to make life interesting.
So I was shooting completely manually - ISO, exposure, aperture (which was pretty much on f1.7 throughout the whole shoot) and focus. It was pretty hard work in a couple of places to nail the focus in the dark, but generally speaking I got there.
One thing that surprised me was Edo saying to set our ISO at 400, maybe pushing up to 800. This wasn’t what I was expecting in such low light - I was just expecting to be at 1600 and possibly getting grainy at 3200. But I’m glad I went with his suggestion. Although some shots had a bit of motion blur, they did end up a lot cleaner and had more punch. Besides, most of my favourite photographers were shooting on film when the fast ISO that we’re now used to wasn’t available - and they somehow managed it!
I was using my trust Oly OMD EM10ii with the Panasonic 25mm f1.7. I did have my Pany 14mm f2.5 and Zuiko 50mm f1.8 in my bag but found they probably wouldn’t have been practical for how we were working. Thirteen of us in tight alleys meant I’d be further back getting heads in the way with the longer lens, and having to get up too close with the wider lens… which would mean getting in every one else’s shots constantly. Now, I’m probably guilty of getting to the front to get my shot quite often and am usually pretty mindful not to get in the way too much… but that wide lens would not have made me popular!
It was a fun evening, added to with some unexpected interaction from a lass from a nearby bar who came over to see what we were up to and then became our model for the next 5 minutes. Edo was excellent - very personable and making sure he went and chatted to everyone as we walked between locations. And I certainly learnt a few things, probably mainly on a technical level; shooting with a lower ISO for example is going to give me cleaner shots with more punch but is also obviously affects what I take a shot of. So if I’m doing that then I want a subject which is more static.
At the end of the evening we were to look through and find our five favourite shots to share. We didn’t actually get around to all sharing five, but I think I’ve narrowed mine down to these…


365 Challenge - Month 1
I’m now just over a month into the 365 challenge and it is starting to be quite a learning curve.
I’m finding that I’m having to get really creative with how I get shots, which is obviously part of the reason for doing this whole thing. But I don’t think I was expecting to be putting the work in quite so soon!
I’m not one for resting on my laurels and don’t like the idea of repeating shots, or the idea of a shot. OK, I’m accepting that some days are going to be easier than others, and some days a shot is not going to be as good as other days. But I still want to try and get a different angle on something, or a different technique.
I think I’m managing it so far. But it’s not easy!
The weather has been quite variable. There’s been some gorgeous, sunny days which has allowed me to play with shadows. There has also been some rain - which has made me think differently about things (whilst trying to prevent my kit getting wet!). I’ve also been out with one or two of my film cameras, which has mean me shooting some stuff on my iPhone. That’s been quite interesting - I’ve found I have a couple of nice shots from that.
Last week, I contacted Erik Witsoe, whose 365 monochrome challenge inspired me to do my own (see blog post from February). He’d said on his website that he was open to anyone wanting to contact him if they were doing their own 365, so I thought I’d pop him an email to find out how he worked through some of the tougher patches of creativity. And I got a very nice, detailed and swift reply from him with some great advice. It’s nice to find a fellow photographer who is not only making great photos but is also a lovely person and willing to give up some of their time like that. It’s things like that which keeps one inspired.
One of the things I took from Erik was to just keep trying different things. Not to always take it so seriously. I think I started out in a bit of a panic about having to capture something, whereas now I’m starting to relax into it a bit. Which means I’m actually just getting on with taking photos and enjoying the process more. After all, there’s always something else that might pop up around the corner that makes a great, unexpected shot.
Talking of which, one thing I have always wanted to get into and not been confident enough about is street portraiture (for want of a better term). And today, a perfect opportunity arose.
It was pouring with rain, and I’d been trying to get some puddle reflection shots. Just after I’d been doing so, I saw a Big Issue seller’s bright umbrella, camping chair etc in the rain. It was a nice splash of colour and I grabbed a shot. Suddenly, the Big Issue seller leapt into shot and posed for me - I wasn’t really happy with the couple of shots but said I’d be back in 5 minutes to buy one of his magazines. Luckily, when I got back (in even heavier rain) he had one mag left. So I bought it and had a quick chat as he packed up, asking if I could get another couple of shots. And he was quite happy to do so.
So, below is my first street portrait. His name is Anthony. He’s a thoroughly pleasant chap.
I’m not sure if it’s the best portrait ever (although hopefully I captured something about him) but it’s a start for me. Not just in actually taking the photo, but the whole idea of getting over that barrier of chatting to a stranger and taking their photo… and them being quite alright about it!

And here are some other faves…


365 Challenge - the first couple of weeks
Somehow the past two weeks have zoomed by and I appear to be in the thick of my 365 Challenge.
As I said in my last journal entry, my 365 Challenge has two rules: it’s all to be in monochrome and there has to be someone in shot that is important to the composition.
I’ll be honest: I’m finding it a bit trickier than I thought. Some days more than others.
This is for a couple of reasons….
Firstly, my rule of getting someone in shot. That in itself isn’t an issue, but getting someone in there which is important to the composition and isn’t just incidental makes things hard at times. There have been a couple of days when I’ve become very aware of not many people around, although a wander round town at lunchtime always seems to give a couple of photo opportunities. Added to that, weekends have been tricky - working in town means weekdays aren’t such a problem. But there’s less people on the weekends near where I live.
Secondly, sometimes finding the time to get some shots is harder than I thought. I usually shoot quite a lot but some days I don’t get anything. Now I’ve set myself a challenge I have to get something! But I don’t want it to be anything - I want good shots (even though I’m well aware that not every day of the year is going to bring something fantastic). And this past week has been hectic at work so I’ve often not had the time to get out with my camera.
However, I am finding that it is changing my approach to my photography already. I’m finding that I’m shooting with more sense of purpose and also noticing possibilities for a shot more than before. I’ve taken to hanging around in a spot for something to happen to make a shot work (see the puddle shot below) or scouting out a location (the guy on the rooftop - I walked round that building several times for a good angle), as well as my usual opportunistic shots.
The Flickr link to the 365 Challenge is here
These are some faves from the last couple of weeks….


365 Challenge
I’ve been thinking for some time about doing a 365 challenge but for various reasons have never got round to it. The usual reasoning (in my mind) is that I’ve wanted to start on the 1st January and do it for a whole year. And so it never seems to have happened.
Recently, I came across the work of Erik Witsoe who is capturing some gorgeous photos. And he has done a couple of 365 projects which started whenever he wanted during the year (See here for some loveliness). Which got me thinking that actually, it doesn’t need to start in January. I can do it whenever I please. After all, surely the very essence of a 365 project is to be doing it for yourself?
So, I decided that the 1st March was to be my start date. Which is tomorrow.
A couple of people have said to me that I take a lot of photos anyway, so why is this challenge? Which is a good question.
I think I want to use this exercise to focus my work a bit more. I want to be able to give a sense of story in one photo. I look at a lot of photography that is classed as ‘street photography’ and there is a saturation of shots which just show people on the street walking or standing about which don’t seem to have any aim. No context, no feeling of back story, sometimes not even interesting composition. I’m not saying my photos to date are giving Cartier-Bresson a run for his money, but I do strive to have something interesting within my shots.
But as with anything in life, I want to get better at it.
At first I thought I’d really try and restrict myself. I was thinking of having one film camera dedicated to the project where I could take only one shot on it per day. But even though that would probably get me better in some areas, I do still want to get some really good shots that I’m proud of! And if I’m restricting myself to just one shot then I can envisage getting a bit frustrated after a while, which is not the point of the project for me.
So I came up with some very simple rules for myself that should give the project focus and consistency without being too restrictive:
Firstly, I’m going to shoot all of it in monochrome.
Secondly, they all have to have someone in shot that is important to the photo.
Those are my only restrictions. I was wanting to add a third rule that the photo has to suggest some kind of story. But over the duration of a year, I’m not sure if that is possible. There are going to be days when the things I encounter out in the world don’t lend itself to suggesting a story.
So, just the two rules. And what I want to get out of it at the end is a sense of structure, some strong storytelling, and a lastng document of a whole year. Furthermore, I want to see that I have got more confident in getting in closer and more personal with subjects.
I’m quite excited but also slightly nervous, which is a good way to be with something like this.
Oh, and next year is a leap year. So it’s actually going to be 366 photos. D’oh!
(Flickr link to follow)
My first experience of Silbersalz35 film
I recently discovered a new colour film called Silbersalz35 (through one of my fave photography sites Thephoblogger). I say ‘new’ but it isn’t really new, technically speaking. Because it’s 35mm Kodak motion picture stock repackaged for stills cameras.
Now, this isn’t an original idea. Cinestill (and others) have been doing this for a while. But the difference is that Cinestill has certain elements removed so it can be processed in normal C-41 chemicals. Whereas this is just the pure film which has to be processed in ECN-2 chemicals. Does it make much of a difference? Well, I thought it was worth finding out…!
Silbersalz are a film production company in Germany. As far as I’m aware, they’re shooting on film and processing and scanning it all in-house. I’m guessing that somebody came up with the idea of repackaging the Kodak motion stock into stills film alongside the production company. And I’m rather glad they did.
You order the films in a batch of four, and they come in the following flavours (the D and T denoting Daylight or Tungsten balanced):
50D
200T
250D
500T
As it was my first test with the films, I thought I’d order one of each. There is also the possibility to order a batch which will be bleach-bypass processed. Silbersalz will process and scan the whole lot on a Cintel scanner and deliver the files via Dropbox as JPEGs and TIFFs.
First up was the 250D. The weather was still quite bright so I didn’t want to try out the 500 just yet, and the 50iso was much slower than I’m used to. Also, they recommend shooting one stop over; so rating the 50iso at 25iso is rather scary when I’m usually shooting at something between 100 and 400!
Now, I only have one shot from this whole roll. And I’m not sure what went wrong but I think there may have been some kind of operator error (ahem!). I have a lot of double exposures, sometimes triple exposures. I’m thinking that maybe I hadn’t loaded the film properly; it seems less forgiving with basic errors like that. But still, it looks pretty nice and the grain seems very good. I like the look. But having a bit of a ballsed up film, I’ll just park this one here and move on to the next…

Silbersalz35 250D, Olympus OM10
Next up was the 50D. It’s slow. But the sun was out. So I thought, why not?
Now, this film is absolutely gorgeous. Exactly what I was hoping for… it’s got this stunning depth and glow to it that is almost three dimensional. The colours have fantastic saturation. It doesn’t look like any film I’ve shot on before - it really does look like stills that have been pulled from a movie. Which is what I wanted.
Even inside using natural light it looks great!

Silbersalz35 50D, Olympus OM10

Silbersalz35 50D, Olympus OM10

Silbersalz35 50D, Olympus OM10
Next was the 200T. And first, the downside… I did have some problems with this one and it took me a while to work out what the problem was. Every time I wound on after a shot, the rewind crank didn’t turn. Was it winding on? Did I not load it properly? After opening up the back of the camera in a black bag, I could feel the film was wound on and there was tension, so I started to suspect that it wasn’t loaded in the canister properly.
But I also started to worry it was a camera issue. So, I carried on shooting but without having much confidence that I’d get any shots back!
At the end of the roll, it did turn out that the film was not loaded properly. However, I said to Silbersalz about this and they very kindly sent me out a fresh film all the way from Germany at their expense - so a big thumbs up for that. I’ve got that film loaded up at the moment, the below shots are from the problematic film.
As for the film itself, I once again loved the look. Understandably there was a little more grain than the 50D, but it was still nice and tight. It being tungsten balanced, I was unsure how blue it would be, but pushing the white balance back towards the yellows in Lightroom quickly popped it back into more natural colours.

Silbersalz35 200T, Olympus OM10

Silbersalz35 200T, Olympus OM10
Lastly, on to the 500T. This is the one closest in speed to my usual favourite colour film, Kodak Portra 400. For this film, I was still a bit unsure about my Olympus and whether it had a problem or not. So I loaded it up in my Yashica Electro 35. Most were shot in one day which was gloomy and rainy at times, therefore it was putting up a bit of a challenge when rating a tungsten film at 250. But I think this film held itself up very well.
It has noticeably more grain than the others. But not in a distracting way. What it does have is a lot of flexibility - I was able to pull out some good shots from some quite murky exposures.

Silbersalz35 500T, Yashica Electro 35
Silbersalz35 500T, Yashica Electro 35

Silbersalz35 500T, Yashica Electro 35

Silbersalz35 500T, Yashica Electro 35
I think Silbersalz have got an excellent thing going on with these films. Straight away it has given me a different look to my shots - I think it’s closer to what I’ve had in my head for a while. I still need to experiment a bit more but my first impression is that all of the films look great, and all of them are extremely flexible for post processing. I’ve even tried knocking a couple into monochrome, and working with them just tonally has been great too.
The scans are also very good. Hardly any dust or hairs - Silbersalz have really looked after this. But be warned - the TIFF files they provide are BIG. The download was about 7GB per film. But worth it for all that lovely filmic detail.
And it’s an excellent price too. They’re currently selling four rolls including processing and scanning for €40. OK, there are shipping costs both ways too, but this maxed out at €60 which is still great value for what I’m getting.
Out of the four films, I think I’d probably say the 50D is probably my favourite. It is silky smooth and I love the rich colours. However, it is currently winter in the UK and trying to shoot at 25iso is very restricting, so I think I’ll save that one for the summer. For now, I’ve ordered up four rolls of the 500T but with the bleach bypass option, and I’m really looking forward to how that turns out with some nice wintery light.
This isn’t an advert whatsoever, but you should really have a look at what they’re up to https://silbersalz35.com.
Kodak Tri-X.... finally braved it!
Kodak Tri-X.
What do we know about it as a film?
Well, it’s been used by some of the most famous photographers to create important, fantastic, iconic images across all genres of photography. If you’ve seen a black and white photo over the past 60 years (or more) that has stopped you in your tracks, chances are it may well have been shot on this film.
It was originally released in 1940 in sheet format, with 35mm and 120 formats being released in 1954. Like other things that have stood the test of time of that era (like a Fender Strat or a Gibson Les Paul), some tweaks have been made since then. But fundamentally it is still the same. They got it pretty much right first time out.
Some of the photographers that have used this film are my benchmarks: Don McCullin, Henri Cartier-Bresson, Robert Frank, Pennie Smith, Garry Winogrand, Vivian Maier, Anton Corbijn….. and many more. Apparently Sebastien Salgado wouldn’t even switch to digital until he was 100% sure he could emulate Tri-X.
It’s the kind of black and white photography I love. It’s not overly grainy, but still has a bit of bite and grit to it. It has life to it. But it also has a lot of history to it because of all those fantastic photographers. In the same way as picking up a fantastic guitar has, you know that you can’t hide behind any excuses. There’s no “oh, this film is a bit too grainy/doesn’t expose properly in the midtones/hard to scan” etc etc blah blah blah.
No. This film has been proven to be bloody awesome.
Which is why I think I’ve not tried it until now. I’ve been a bit scared of it.
So, I put a roll of it in my OM10. Rated it at 200, took a deep breath, and went out to play.
I’m not sure if I got my best ever shots whilst trying it out (more down to the usual things - light not being perfect, missing a particular moment etc) but WOAH!!!!!! this film is soooooo good!!!
I’ve said before how I love Ilford Pan 400. And I do. Really, it’s an ace film.
But Tri-X really is on another planet to anything I’ve shot with before.
Once I’d scanned the negs and popped them in Lightroom, it was an absolute breeze working with the shots. So much flexibility in the tones. I could crunch the blacks down but still keep loads of detail if I wanted (look at the blacks below! Yum Yum Yum!!!). There was massive amounts of detail in the highlights I could pull back down. The grain was nice and tight; just enough to give the shots a bit of life without being intrusive.
The missus even stopped what she was doing to say how good the shots looked (this is a rare thing - she likes my photos but rarely stops what she’s doing to actually come and look over my shoulder as I work).
This film just has life to it. It has something which you just cannot put your finger on.
It’s not cheap. So I’m not going to shoot a lot of it. But it’s going to be my go-to film for special stuff. (Honestly. I’m not going to order shedloads. Really!!)
Is picking up a 60s Strat going to turn me into Hendrix on Voodoo Chile?
Is picking up a 50s Les Paul going to help me make the sounds Clapton did with John Mayall?
No. Not a chance.
I’m not expecting this film to give me McCullin’s eye. There’s way more to it than just the film.
But shooting with this is a pretty damn good starting point to getting a gorgeous image.
Seriously hooked on this….


Pushing film
I’ve recently experimented with pushing some film. It’s not a new idea but not something I’ve personally tried before.
For those that don’t know what pushed film is, I’ll explain it quite simply:
You underexpose the film and then push it back to what it should be in the developing.
For example, if you have a 400iso film and expose it as 800iso then you’re pushing it by one stop of exposure. This will allow you to shoot at a faster shutter speed but the film will be one stop underexposed. Therefore when it is developed, it needs to be adjusted accordingly.
Why do this?
Well, it can be handy in low light situations. If you only had a 400 film you could shoot it at 1600 in bad light.
Also, as an aesthetic decision: when you’re pushing film in this way then it increases grain and contast. So if that’s the look you want then it’s a good way of getting it in camera.
I had some rolls of my favourite films from the summer left in the fridge: Ilford Pan 400 and Kodak ProImage 100. Having shot quite a bit on these two films, I thought they’d be pretty good to experiment with.
Both of them I shot pushed by two stops. So, the Pan 400 I rated at 1600 and the ProImage 100 I rated at 400.
First issue I found which I didn’t expect at this time of year: really bright sunlight. Not just the occasional bright Autumnal morning. Nope - bright, contrasty light all day for a week or two. It was lovely for catching shadows… but I was rating my 400 film at 1600. Which meant I was pretty much stuck on an aperture of f16. Which isn’t the end of the world but I do prefer a bit of flexibility!
To be honest, I’m unsure if pushing the Pan 400 really added much. Apart from some grain. I think it’s fine to use for pushing and I’m happy with the results (and it ends up being cheaper to push this than buy some faster film!) but I don’t think it really added anything to the shots.


When pushing a colour film the saturation levels should also increase. The scans from the pushed ProImage had noticeably more punch to the colour. Not that the colours were washed out before. It’s just there was a noticeable difference after having been pushed. More contrasty colours; possibly good to play around with during the winter.


Overall, it’s been handy to try pushing a couple of films and I will probably try some more. However, the downside is that the whole film has to be push processed, so you are tied in to doing that for the whole film. Which - as I found with the 400 speed film - can limit you from time to time. However, I’m quite interested in trying it out for a gig I’ll be shooting next month.
All shot on my Olympus OM10. As far as I remember, these were shot on either the Zuiko f1.8 50mm or Panagor f2 35mm.
Scanning, holidays, and new films
For quite some time I've felt the need to have more control of what is going on with my film scans. I've used several labs over the years for processing and scanning, and whilst none of them have done a bad job, I've never been 100% sure if it could be better or not. It seems to be adding a variable into the process which I have no control over - is the exposure wrong because of me or is the scanner not set up properly? The same goes for the focus - is the lab's scanner out? Or am I just not getting things right when shooting?
So, I needed my own scanner. By doing it myself, I can not only be more sure of any variables, but I can also tweak each shot if I want. Because I know what I was shooting and what the scene looked like.
I'm a bit tight on space at home, which meant a flatbed scanner was out; which was a shame as a flatbed would do various formats. So I went for a Plustek Opticfilm 8100 35mm scanner.
I'd heard that there was quite a steep learning curve to the Silverfast software which comes with it. The first few scans I wasn't particularly pleased with at all - it was all looking a bit grungey. After looking at some tutorials, I then found what some of the tools were doing in the software and was on top of it pretty quickly.
It has multi exposure on it, which means I can do two scan passes. I'm scanning fairly flat without bumping up any contrast. So the resulting TIFF files are a bit washed out. However, when putting them through Lightroom then they really come to life. I've started saving presets for each one to speed up the post process.
The first scans I made where from a short break in Cornwall. I was trying out some Kodak ProImage 100, a film that is not readily available but is apparently being marketed more in Europe now. Which is a good thing, because I rather like it! It's very much like Kodak Portra - natural colours, nice saturation and renders skin tones nicely. It also has quite a bit of flexibility - I could push certain colours a bit if I wished. The film was apparently first released in 1997 and not been updated since; mixing that with my OM10 and old Zuiko glass gives it a feel of my youth in the 80s/90s.


The next film which I'd not used before was Fomapan 400. I'd used Foma 100 and 200 before (see earlier journal entries) and liked the results - particularly the 200. So I thought I'd give the 400 a shot. I'd read that it wasn't quite as good and I think I'd have to agree. Tonally I found it quite flat and stubbornly didn't want to be pushed anywhere. Too much exposure made it break up quickly, too much shadow just crushed the blacks. I like a bit of grain with my black and white film, but the grain I found a bit crude. Unlike Foma 200, I don't think it will be high on my shopping list in the future....


Next up was Ilford's Pan 400. And this was completely different - nice tight grain, a wide range of greys in the tone allowing me to play with it to my heart's content, and a gorgeous look which has an almost 1960s documentary look to it. I've got another roll in my camera at the moment and already excited to see how it turns out - really love this one!


One thing that I didn't expect from using my own scanner was seeing the difference straight away between different emulsions. I could see a massive difference between Foma 400 and Pan 400 just by seeing the initial scans before I even put them into Lightroom. Even the physicality of the film is different - the Foma more prone to being damaged than the Ilford.
I have to say, the Plustek scanner is great. I've got scans from it that are just as good as I've been getting from pro labs. And I'll be tweaking the settings more to see what else I can get out of it.
And Kodak ProImage and Ilford Pan 400: big thumbs up! Now, I wonder what Pan 100 is like...!?
All shot on my Olympus OM10.
Kodak ProImage 100 rated at 80asa.
Fomapan 400 rated at 200asa.
Ilford Pan 400 rated at 200asa.